

Gouache Basics Painting Lesson
Free premium lesson for how to use watercolor’s opaque cousin, gouache.

Welcome to Artist’s Cheat Sheet! This is a premium basics lesson which I am making available for free. If you are able to contribute as a paid subscriber, please tap the button below! Let’s begin.
In this gouache basics lesson I cover:
Basic properties of gouache paint
What is acrylic gouache and how is it different from gouache?
Gouache Cheat Sheet
Practice exercises
Links to video demos
At the start of my Intro Painting course today I asked for a show of hands. How many people had never heard of gouache (pronounced GWASH)? Almost all the hands went in the air. “Oh, good!” I said. I like a challenge. I also like introducing people to gouache, one of my favorite mediums.
I love gouache!
There was a time when I hated it, though. In high school I could only focus on its chalkiness, its tendency to turn to mush. “Something is wrong with this paint!” In reality, I just needed to understand the basics.
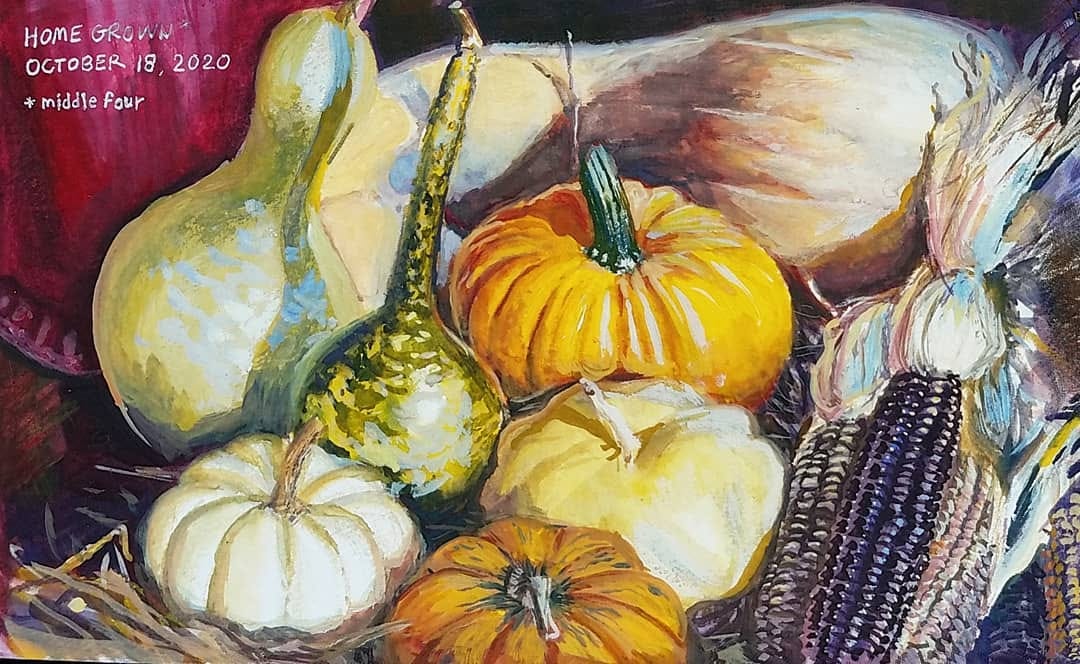
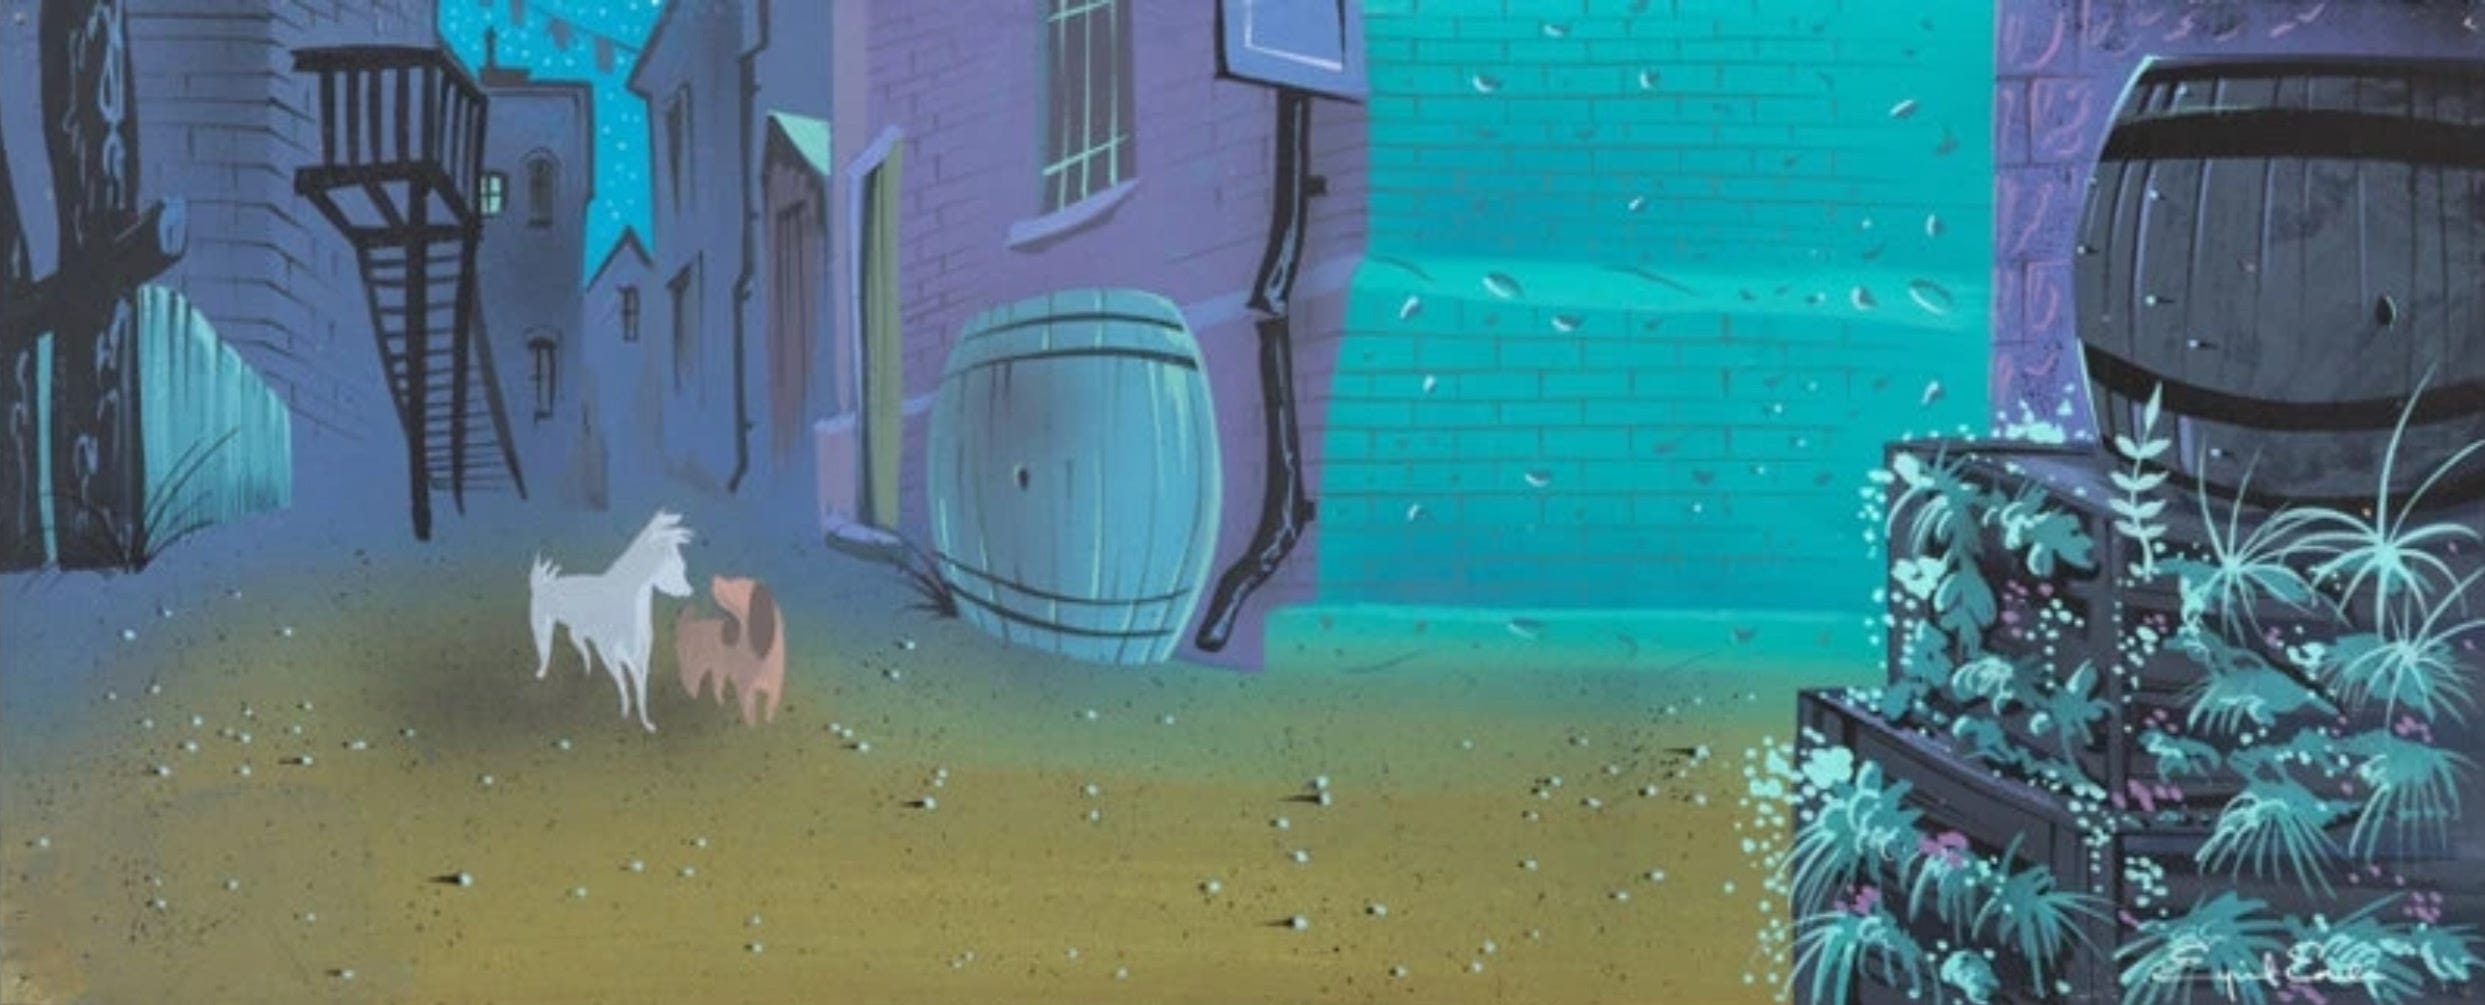
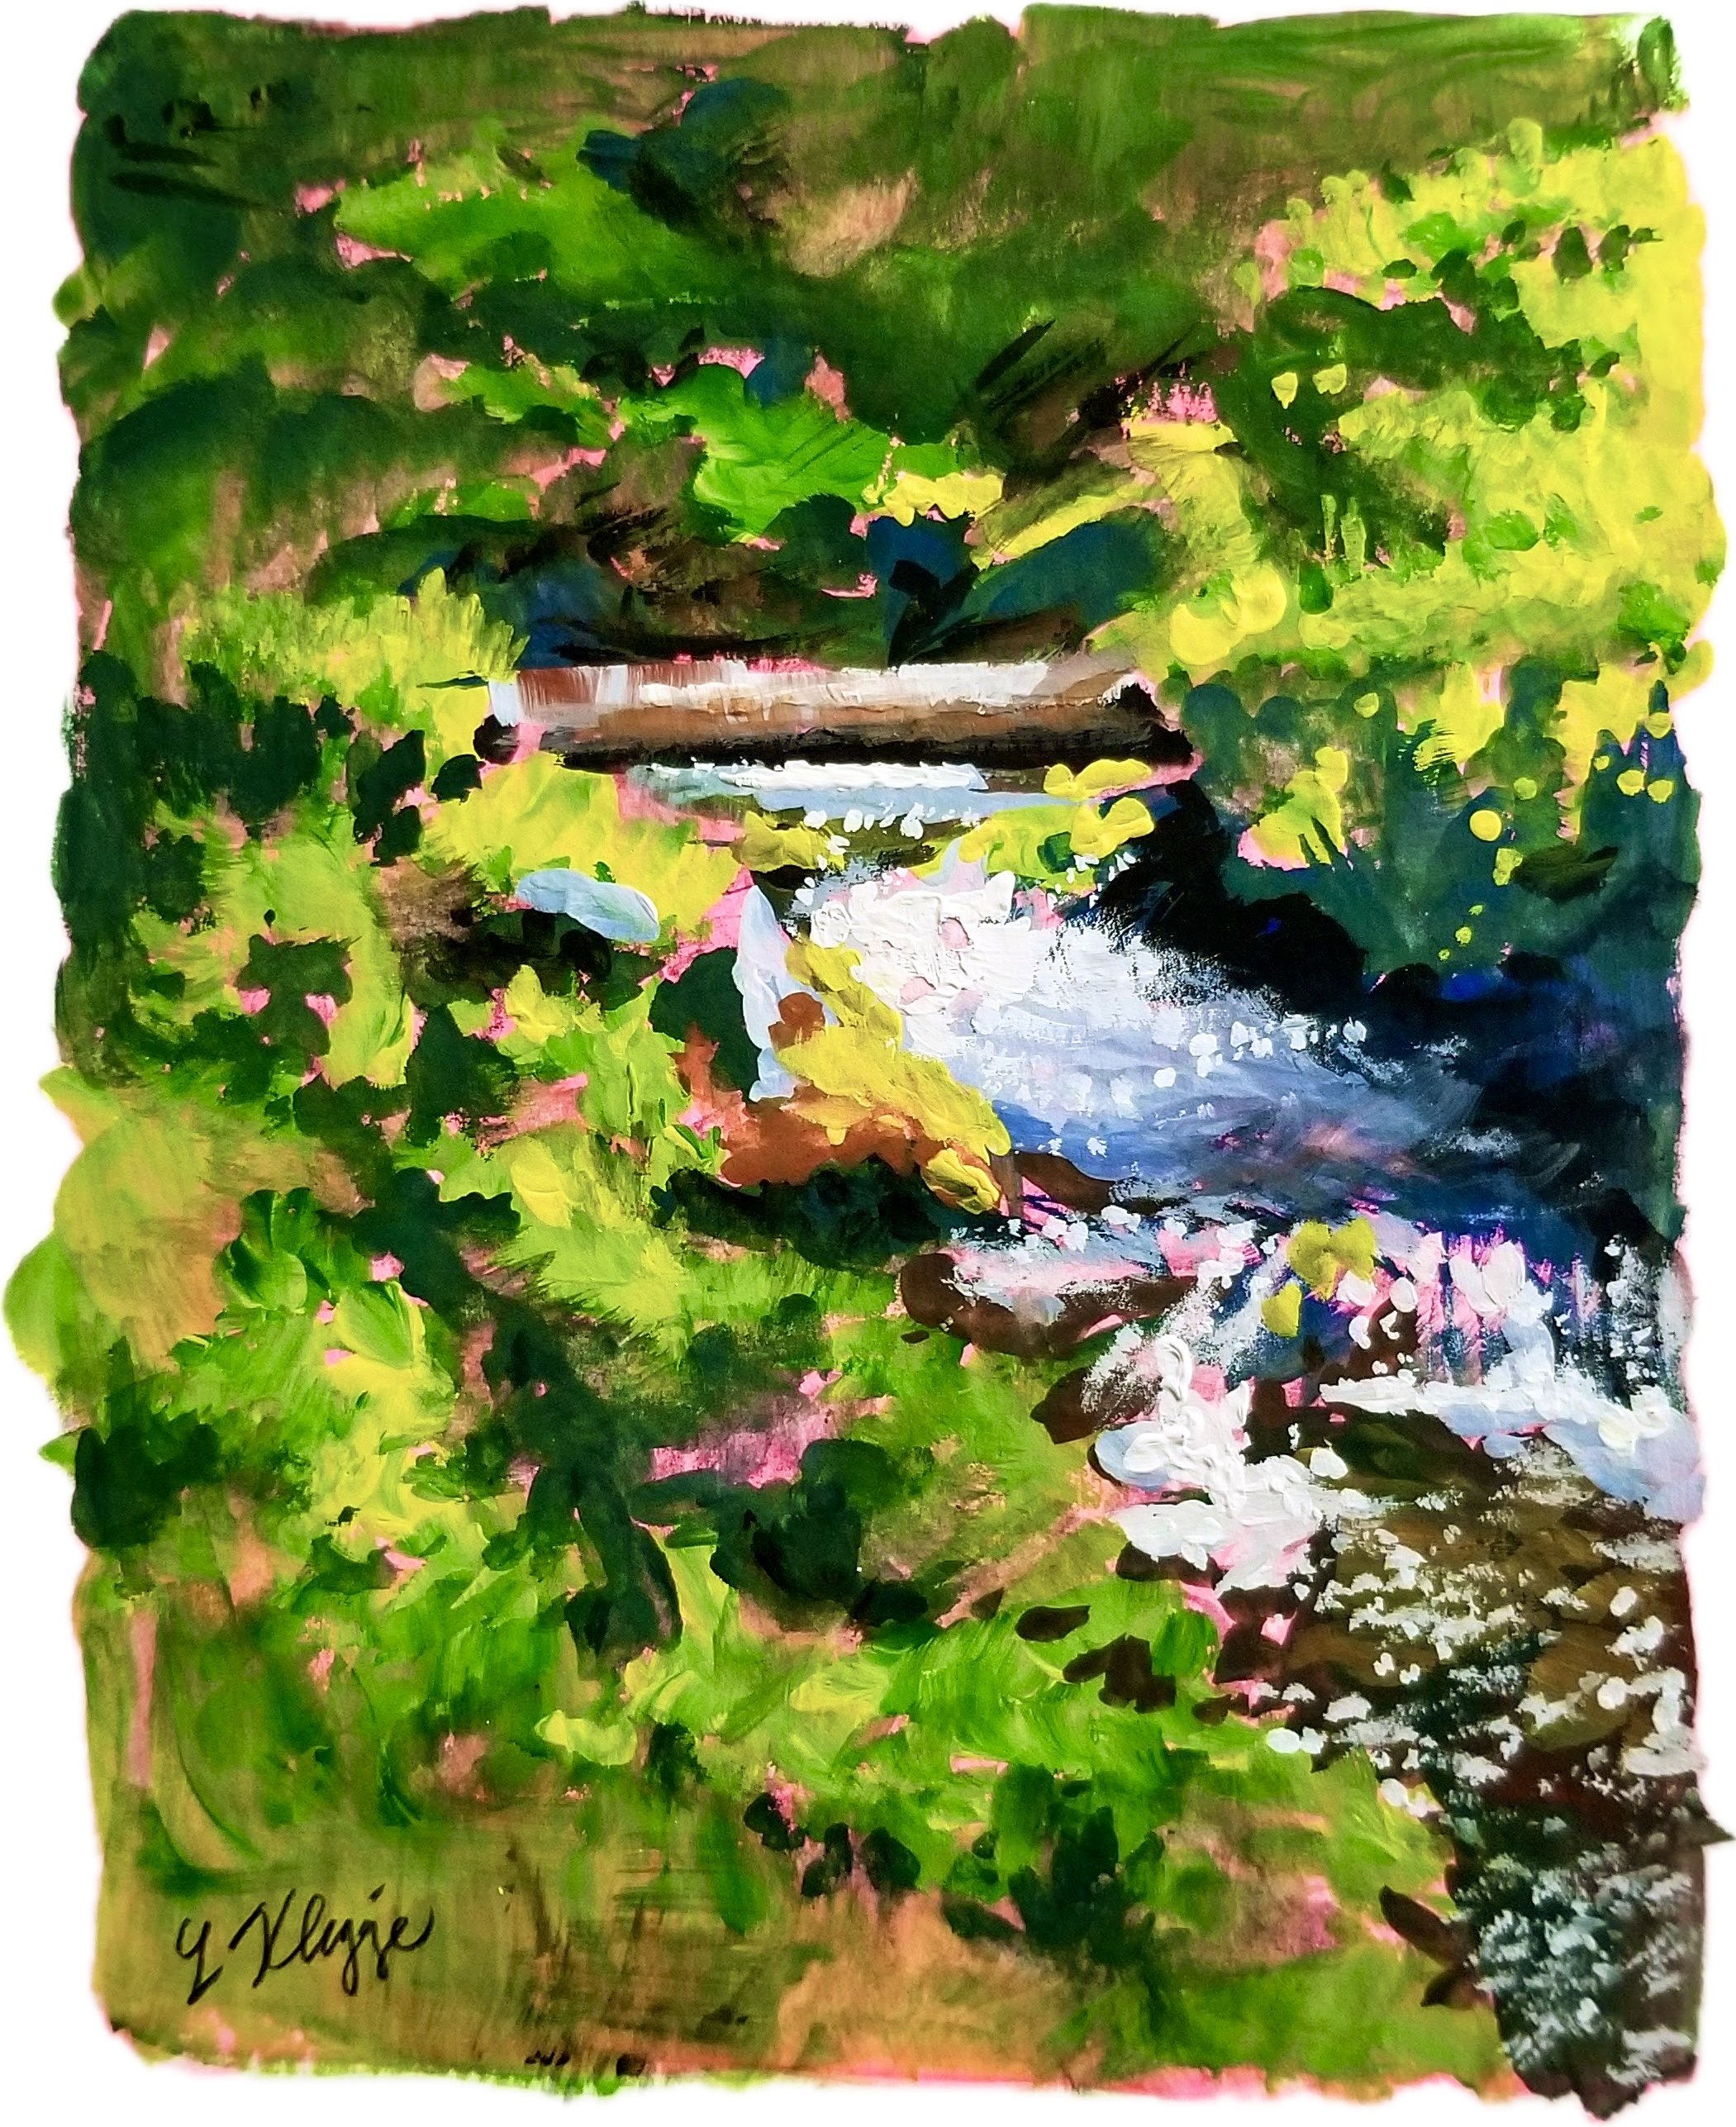
Since then, I’ve come to love gouache’s versatility, portability, and handling properties. James Gurney had a big influence on that. Check out his YouTube channel for some great gouache demos and his Substack. Other artists to look at: Gil Robles, Lena Revo, Justin Donaldson, Mary Blair, Eyvind Earle.
Gouache basics
Gouache is the opaque cousin of transparent watercolors. Both are based on a gum Arabic binder, with certain notable differences and qualities.
Opacity. Gouache is opaque; unlike watercolors, light colored gouache can cover dark.
Consistency. Use gouache like watercolors in the early stages of a painting. After that, mix it to a thicker “melted ice cream” consistency. This is the “workhorse consistency”— when gouache is most opaque. Check that you cannot see through to the palette.
Drying and reactivation. Gouache dries quickly and reactivates quickly in the presence of water. This provides a very short window of time for blending. I share several strategies for that below.
Color shift. Gouache tends to shift color from wet to dry. Oftentimes light colors dry a bit darker. Dark ones dry a bit lighter.
Matte surface. The velvety, non-reflective surface of dry gouache is great for photographic reproduction. It is also receptive to media like pencils and chalk. Many Little Golden Book illustrations and animation background paintings were made with gouache.
Use gouache with the same materials you might use with watercolors. For beginners I recommend Strathmore 300 or 400 series cold press (textured) watercolor paper, a few wide flat or pointed round synthetic brushes, a detail brush, water cup, rag, palette (like a white butcher tray or something impermeable and white with raised edges).
There is no “acrylic gouache”
“Acrylic gouache” is a confusing term you may come across. Beginning students don’t know if this paint is acrylic, gouache, or a mixture of both. Let me set the record straight. Gouache is gouache, and so-called “acrylic gouache” is acrylic paint that dries to a matte finish. Acrylic paint, unlike gouache or watercolors, will dry permanently in your brush!
Gouache and matte acrylic both dry to a matte surface, and that’s about all they share in common.
Golden Artist Colors has a beautiful range of matte acrylics called Golden SoFlat Matte that I recommend, if you’d like to try matte acrylic paint (I refuse to call it acrylic gouache!)
Gouache Cheat Sheet
Let’s practice with paint now. Divide a 9 x 12 sheet of watercolor paper into three rows and five columns as shown below. You can also eyeball this. Have a pencil handy to jot down captions and notes.
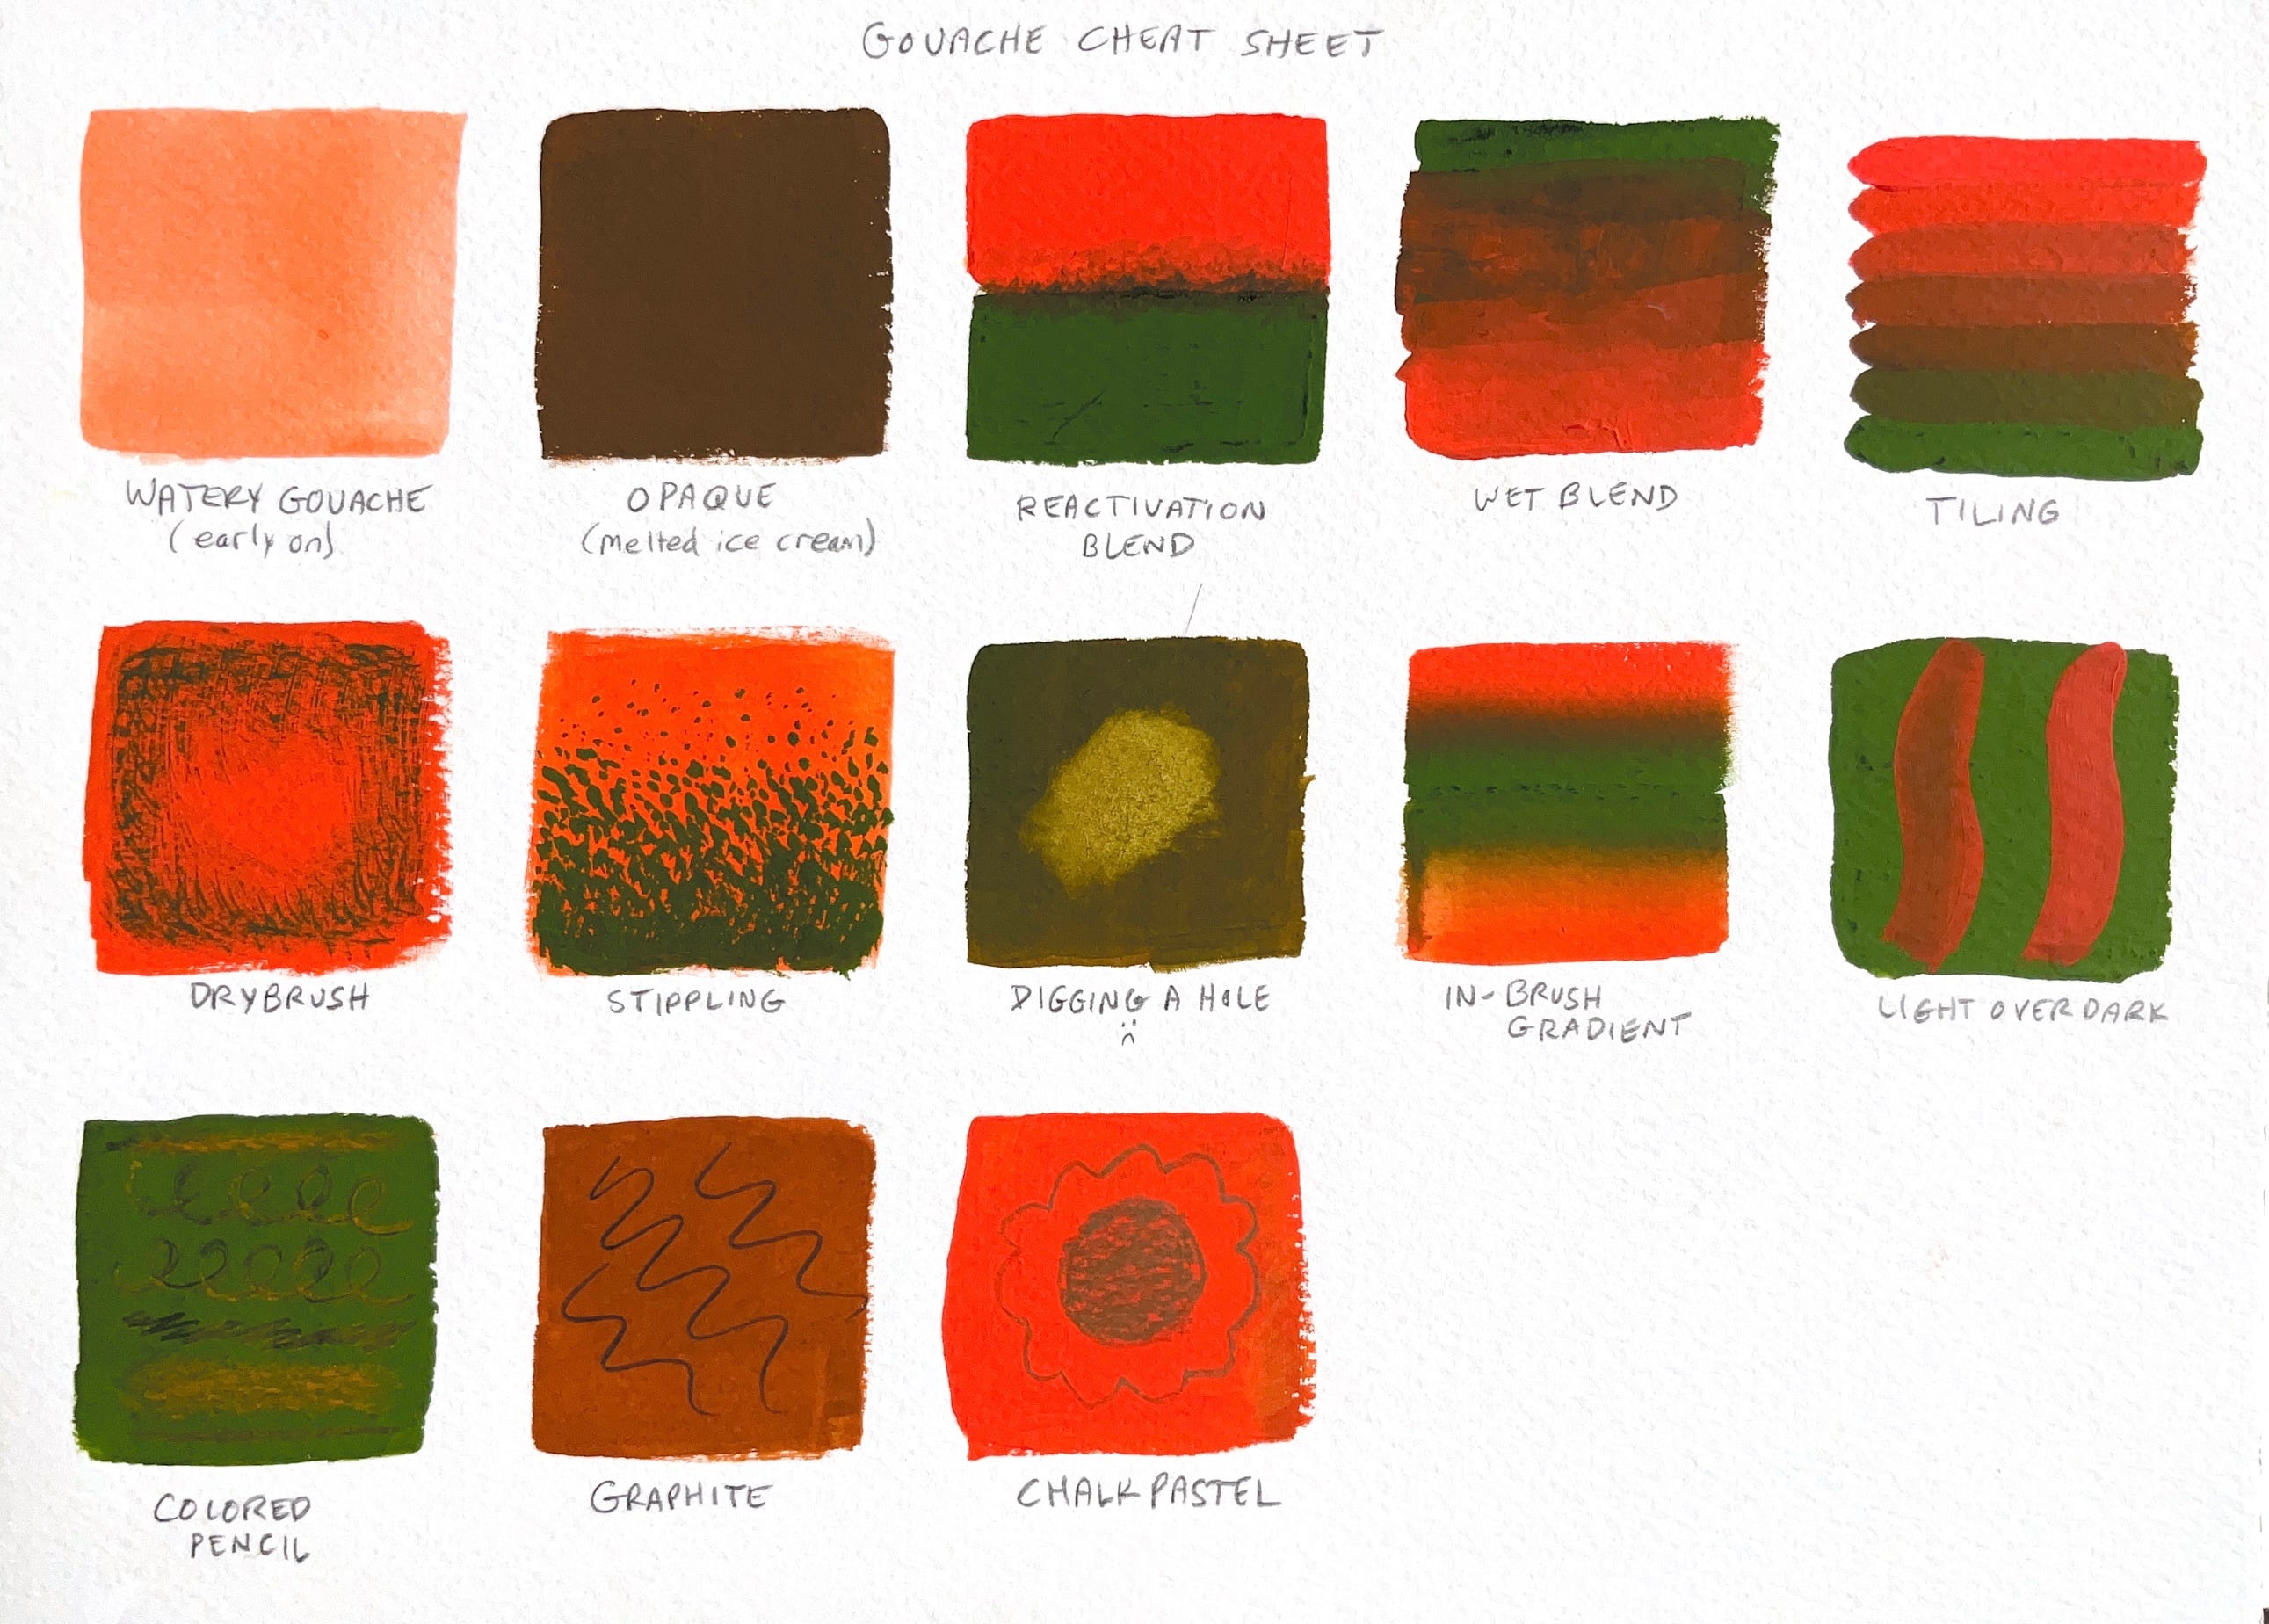
Create a series of swatches, paying close attention to the intended lesson in each. In some cases, you’ll let the swatch dry completely, and then return to complete it.
Choose just two colors of gouache, one lighter than the other, to complete the entire Gouache Cheat Sheet.
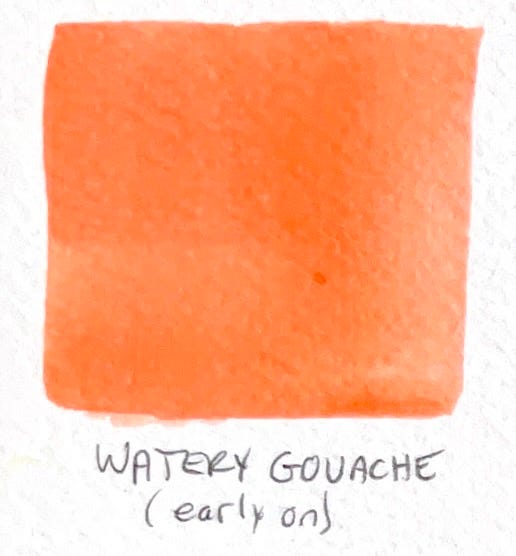
Watery gouache. Thin one color of gouache to a transparent watercolor consistency and create the first swatch. This is a good way to start a painting. Thin paint doesn’t present a reactivation problem later on. You can quickly block in large areas of color, too.
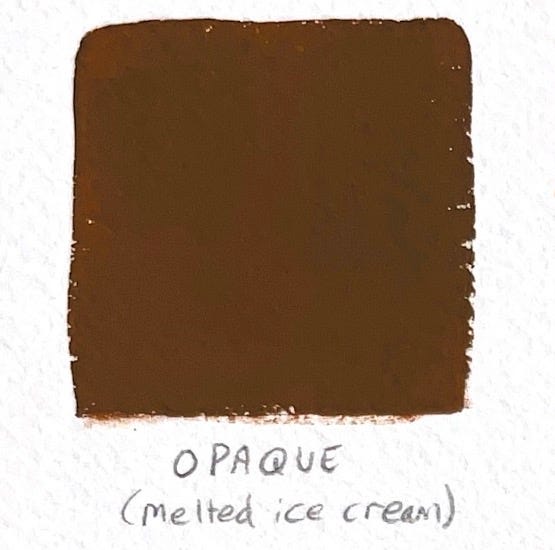
Opaque gouache. Control the wetness of the brush with your rag, and add a little water to some gouache on your palette, stirring until you get the consistency of melted ice cream. The paint should be opaque enough to hide the palette. Make a swatch. (The majority of your painting will be made with this form of gouache.)
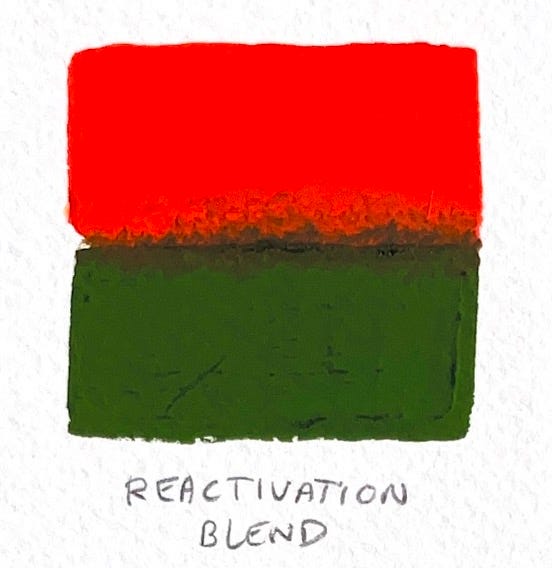
Reactivation blend. Use opaque gouache to paint two abutting patches of differing colors and let them dry. Later, run a slightly damp brush a couple times along the border between the colors, softening the hard edge. If you begin to see white paper, stop. Consider whether a thicker application of paint was needed
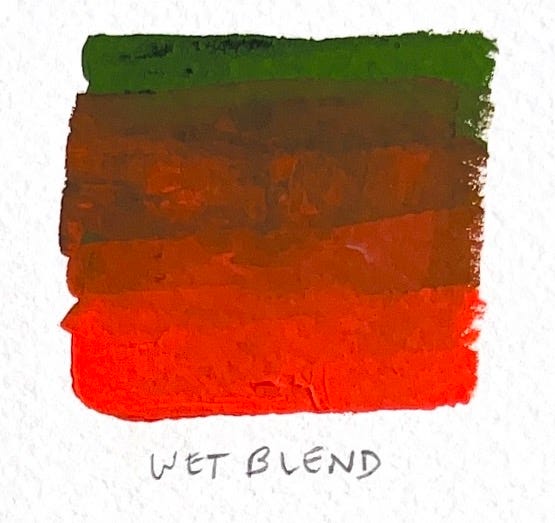
Wet blend. Paint a strip of your darker color; while that is still wet, introduce your lighter color, overlapping the edge slightly and pulling the brush several times across. The paints will blend into a soft gradient.
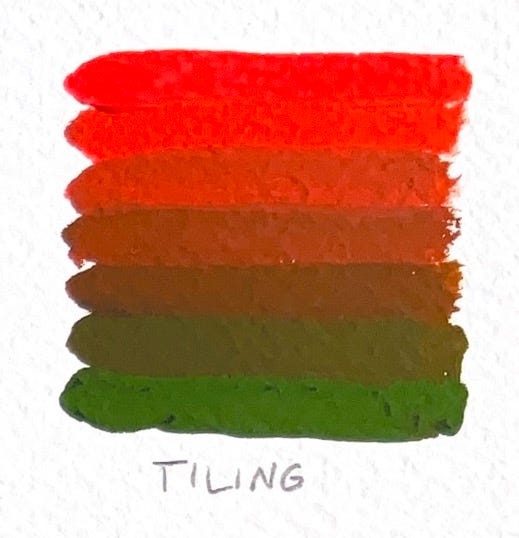
Tiling. In your palette, create several “piles” of color: the pure dark color, the pure light color, and several mixtures in-between of varying proportions. Paint these as adjacent, unblended bands, that will appear to blend from a distance.
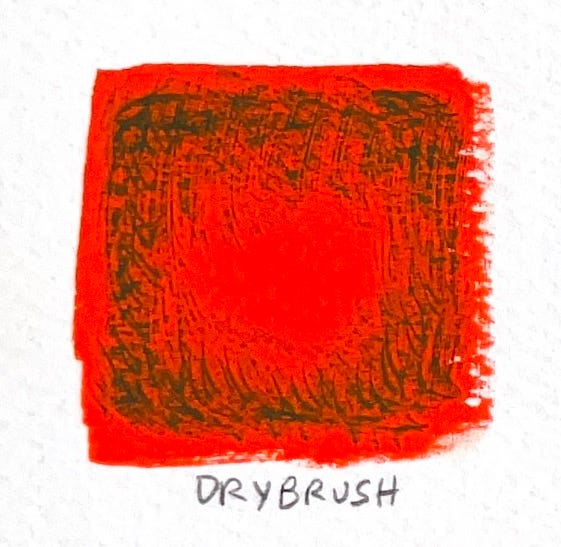
Drybrush. Try using a totally dry brush and paint straight from the tube. Drag the paint across the paper. You should feel the brush “catch” the paper surface, producing a dry, streaky look.
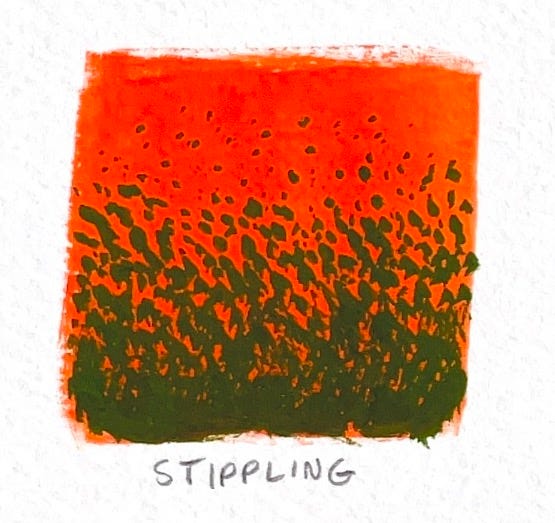
Hatching. Create the appearance of blending with tiny, repeated, overlapping strokes (hatch marks) of both colors.
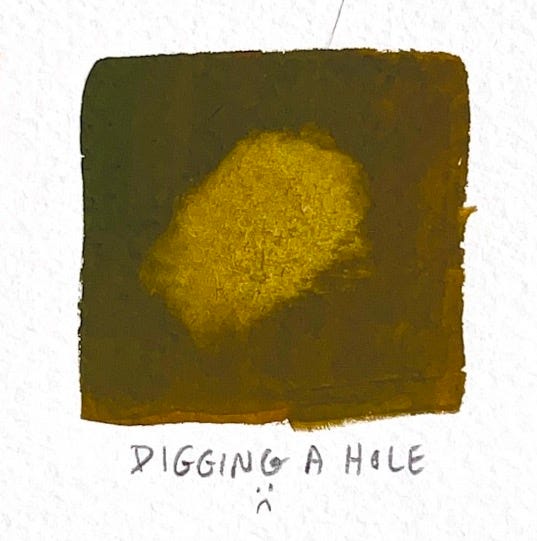
Digging a hole. I coined this term for example of what not to do. Allow a swatch of color to dry, then “dig a hole” through the paint to the white paper by repeatedly stroking one spot with a wet brush. If this happens to you while painting a picture, stop. Let the area dry, and then come back later with paint.
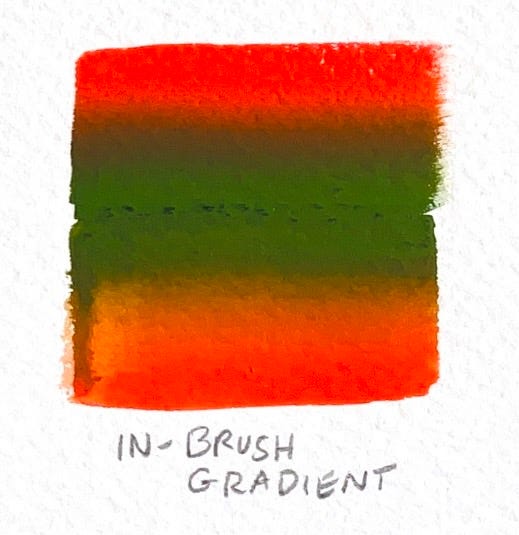
In-brush gradient. I learned this one from James Gurney. Place two dollops of different colored paints side-by-side on the palette. Using a flat wide brush, pull it through the two paint piles (each corner of the brush will pick up a different color). Repeat until you see a gradient form on the palette, then pull the stroke on your paper.
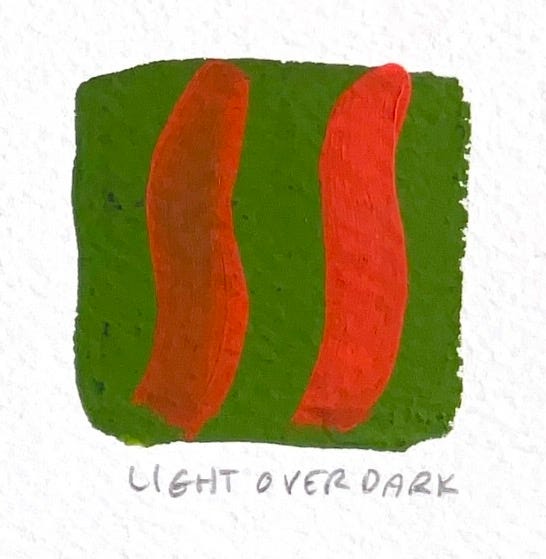
Light covers dark. Paint a dark swatch. Let it dry. Using opaque consistency, pull a decisive stroke of light paint across the dark and let it dry. Cheaper gouache will have less coverage. In that case repeat the stroke after the first has dried. Remember to “get in and get out” (make the mark, then leave alone it to dry out).
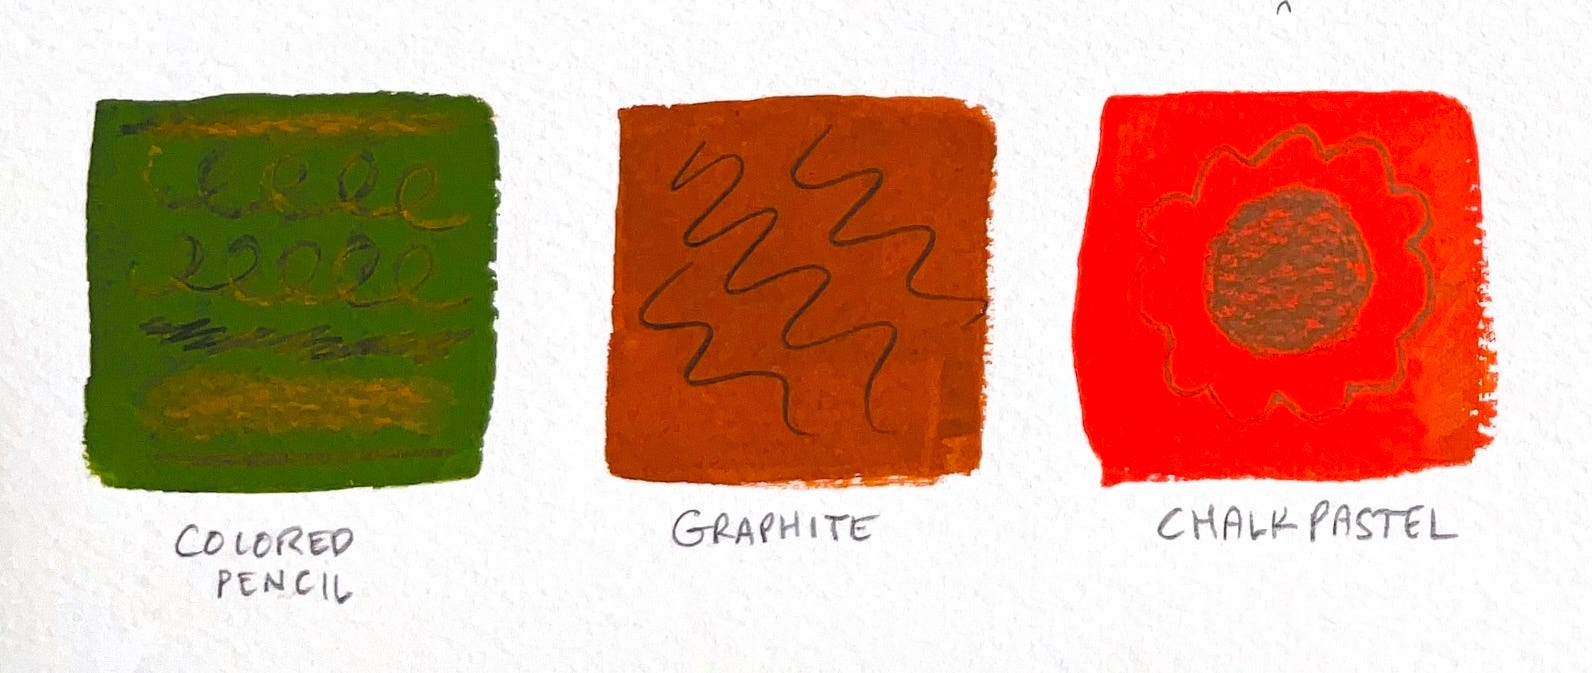
Chalks, graphite, colored pencil. Make a few more swatches of gouache and see how different drawing materials interact with the dry surface.
Bonus. Try using Winsor-Newton’s Watercolor Blending Medium on another swatch, and see how that affects gouache’s blendability. Use another space to invent your own swatch.
Practical exercises
Now that you know the basics, put them to the test! You could try any of the following exercises.
Paint a fast landscape from imagination in transparent watercolors, then duplicate it in opaque gouache. Note the difference in your approach.
Paint a solid background in matte acrylic using a bold color. Once it is dry, make an opaque gouache painting on top. How is your process different when you know the underlying acrylic color won’t reactivate?
Watch a short documentary about Eyvind Earle’s gouache painting process forDisney’s 1959 film Sleeping Beauty, and then try to paint a tree or bush in his style. Earle would begin with a black rectangle and build up increasingly bright layers. (Also, see a digital demonstration by me, below, imitating this style.)
That’s all!
I hope you enjoyed this free painting lesson. Happy painting and remember to please share, restack, and subscribe!