


Outdoor Winter Watercolor Painting
Notes from my all-day painting workshop in Chester Springs, Pennsylvania

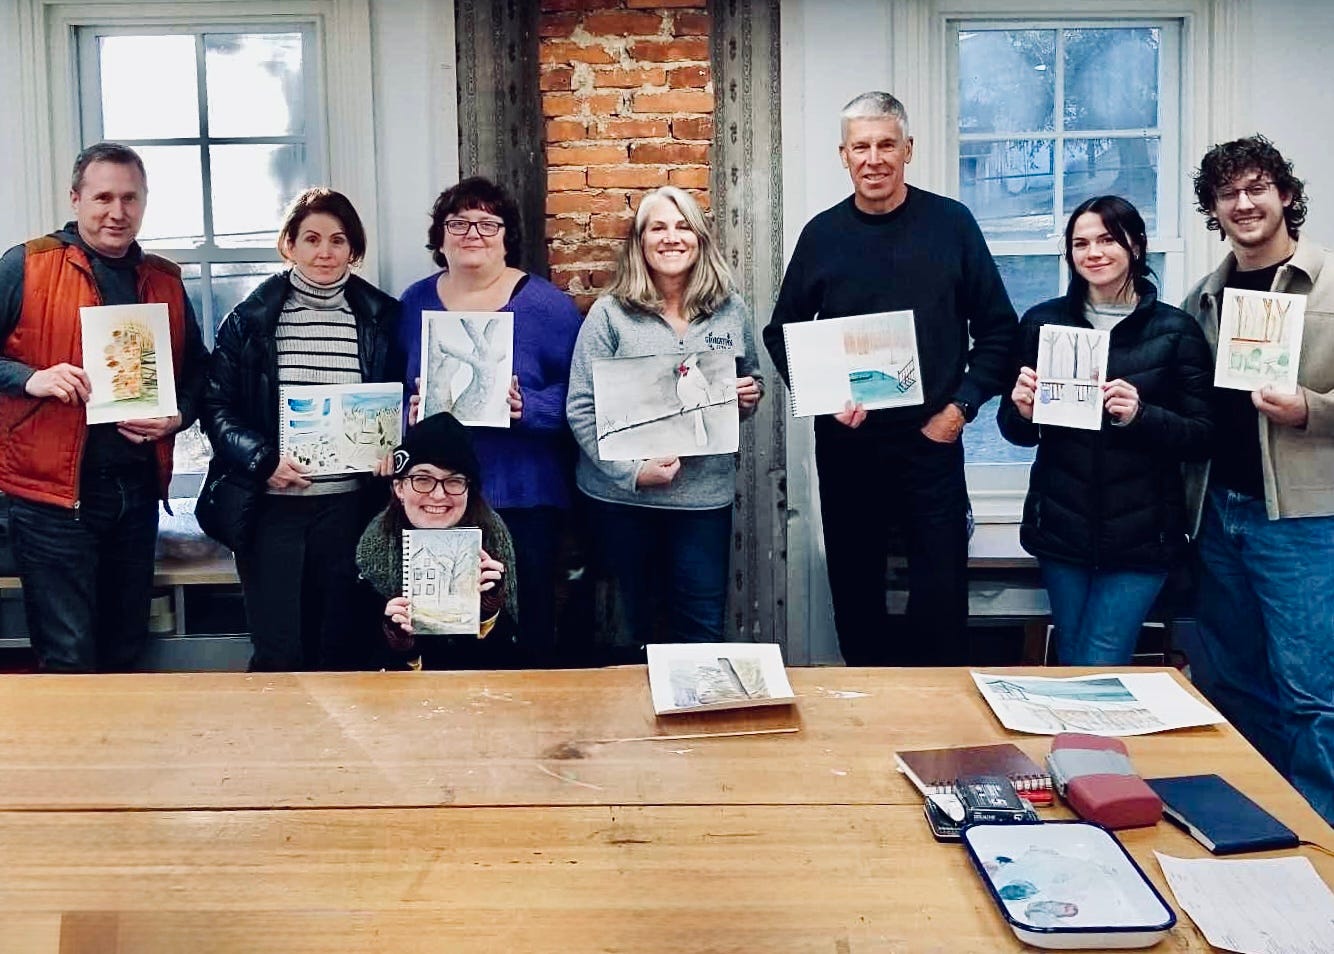
On Saturday I had the pleasure of hosting these artists at my winter scenery painting workshop at Historic Yellow Springs in Chester Springs, Pennsylvania. Below are some class notes with an expanded section for the class members and all paid subscribers. (You can learn more about the arts center and check for workshops offered by me and others at the Historic Yellow Springs website.)
Schedule of events
Here’s what we did during our all-day painting workshop. Upcoming all-day workshops will have a similar structure.
10:00 AM—Welcome, introductions, studio orientation
10:30 AM to 12:30 PM—Watercolor and gouache demos (indoors) and the importance of values, shapes, composition
12:30 to 1:00—Coffee at Life’s Patina Cafe
1:00 to 2:45—Practice painting indoors
2:45 to 4:00—Painting outdoors
4:00 to 4:30—Debrief, art share, class photo, farewell
10:00 AM—Intros, and new Fraley Studio
At 10 AM we stepped into the newly-refurbished Fraley Studio, still smelling like freshly-cut lumber and paint. Our work space was beautiful and filled with sunlight. My guests were eager to learn!
Some students had almost no previous formal art training, and some were actual art teachers. Most had never used gouache (opaque watercolors) before. Ahead of us lie a day full of potential and new things to discover.
10:30 AM—Thumbnail sketching
Three-inch wide, five-minute thumbnail sketches are used to plan out the most impactful part of your painting—the composition, so we began there. Whether you are copying a photo or working outdoors, sketch a simple version of your idea, committing to filling in every area with white, black, or gray shapes. Is the resulting composition interesting?
Try several versions. Once you’ve found one you like, you’ll imitate the composition in the final painting—the same arrangement of dark, mid-tone, and light shapes will be replicated in your painting, but larger, and probably in color.
Thumbnail sketching is a good way to capture shadows and light shapes outdoors—before they shift with the moving sun.
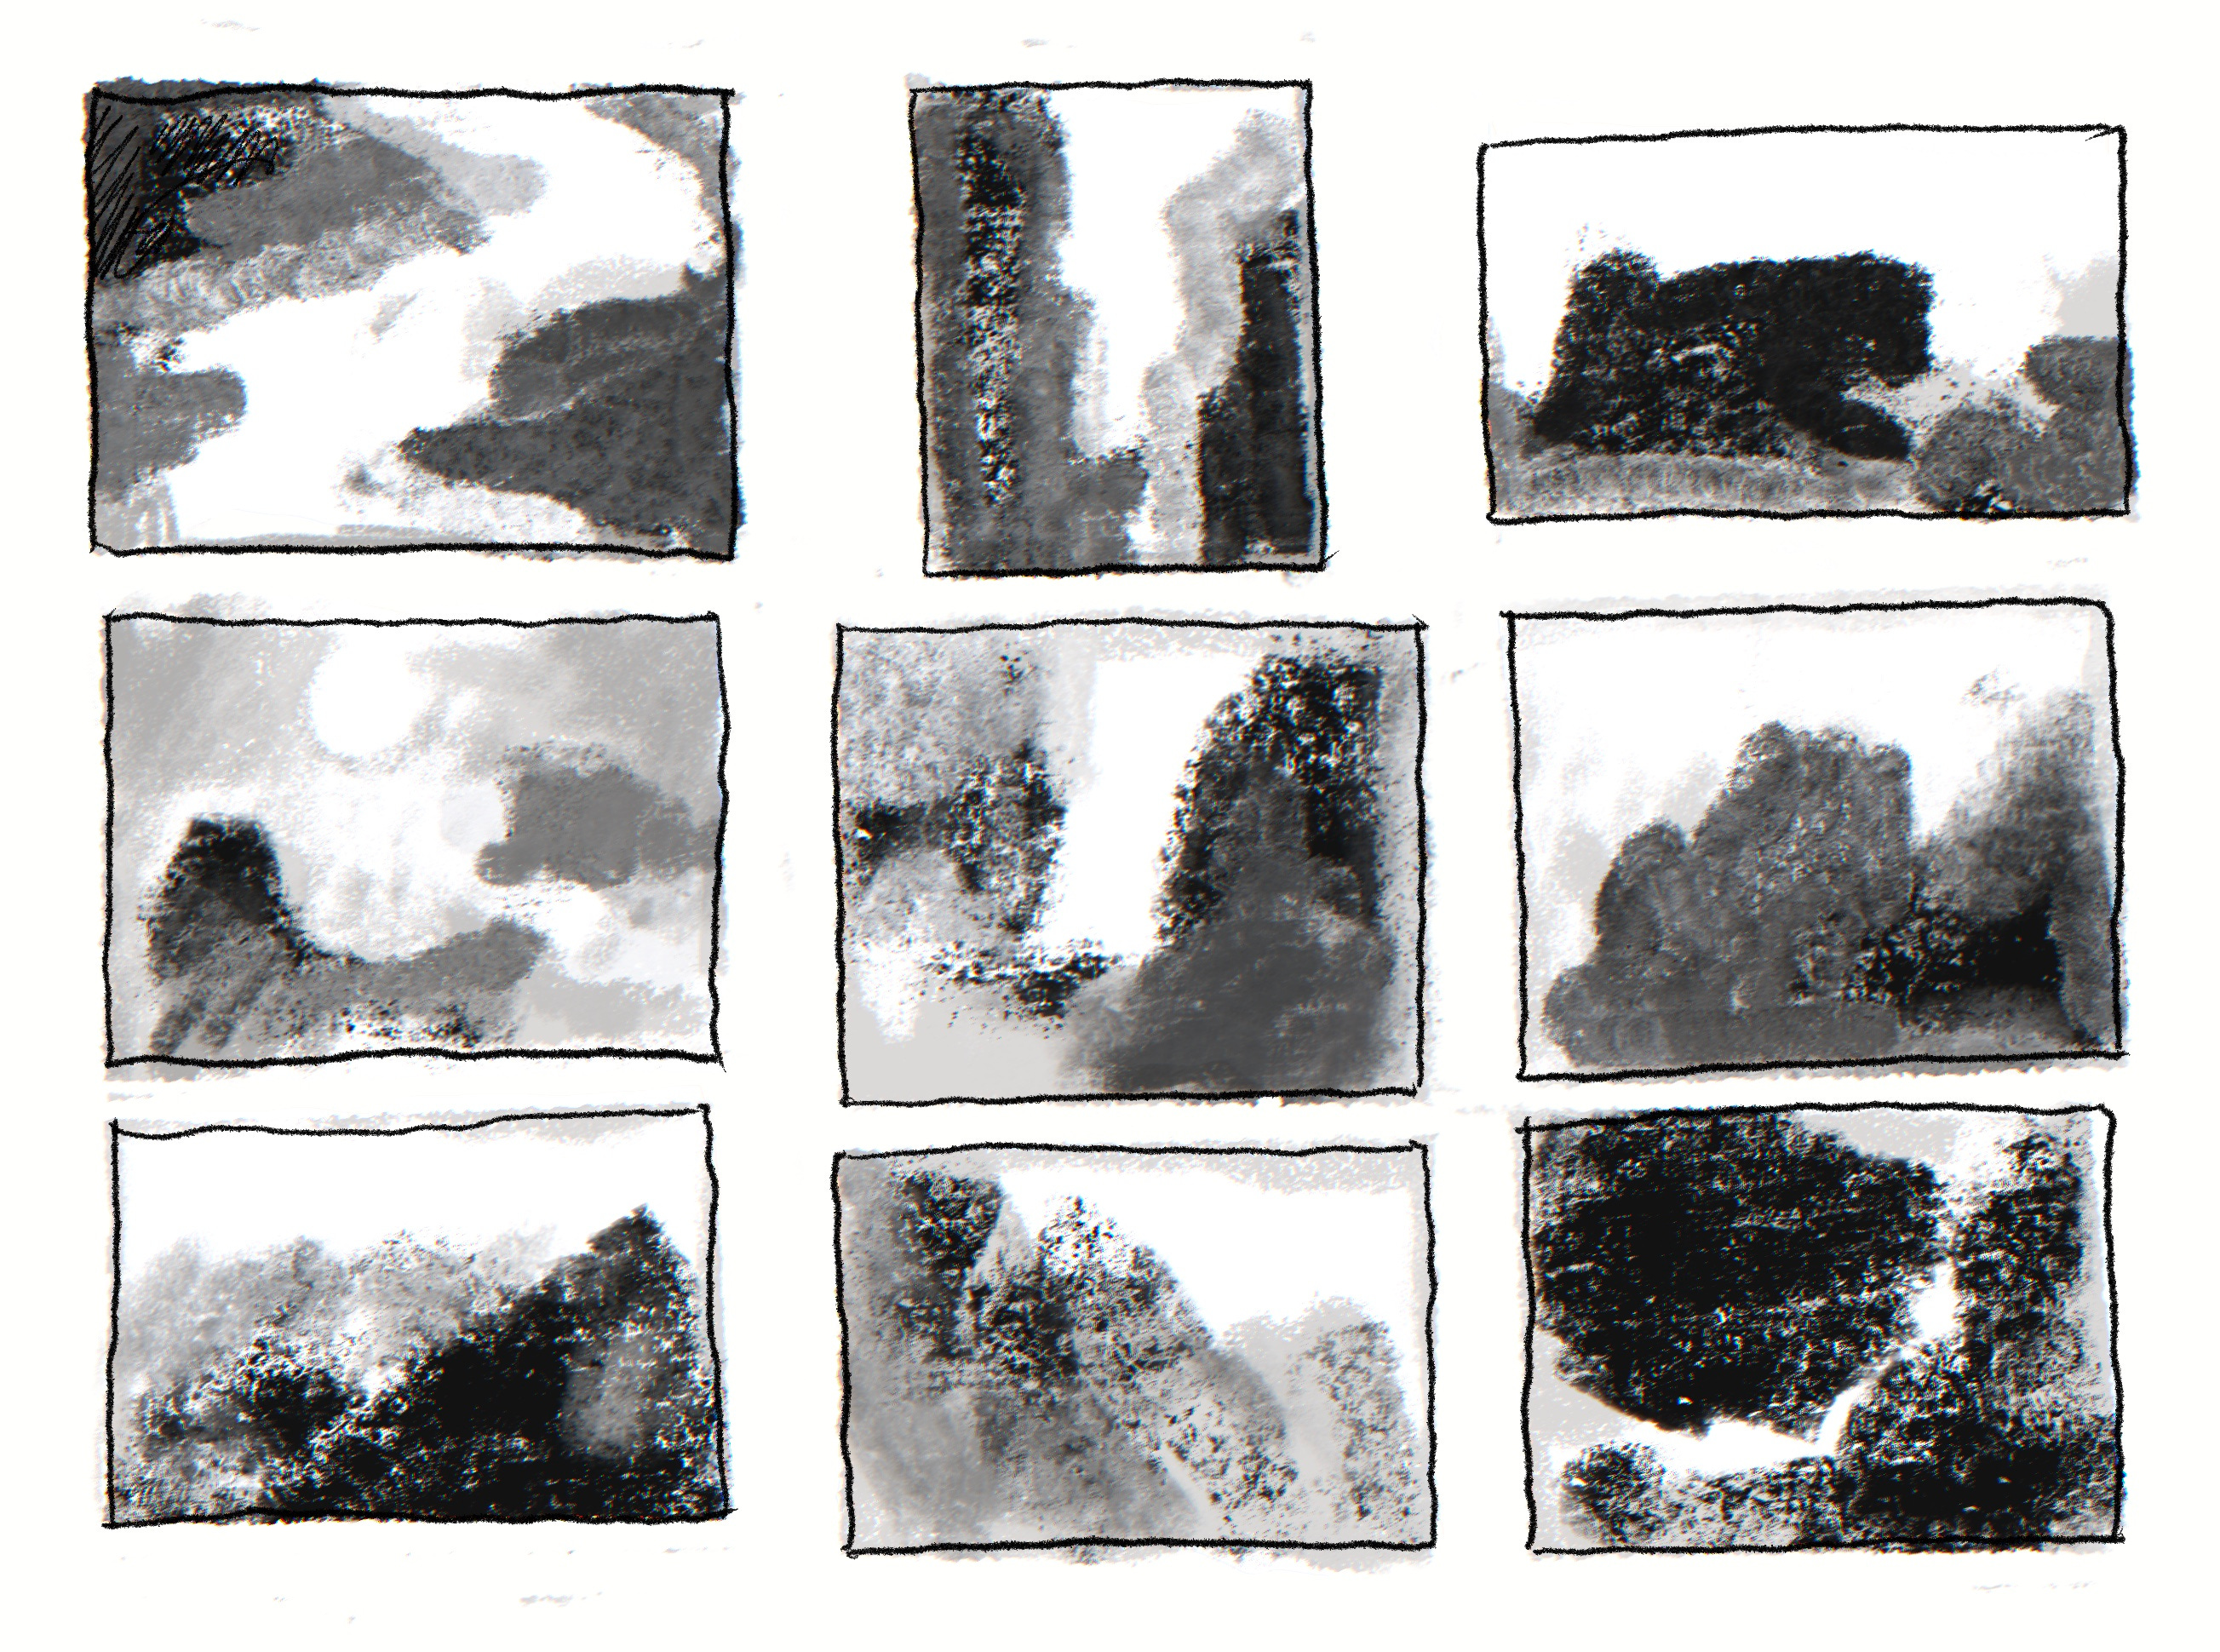
Before I began my demo paintings, I verbally identified the lightest lights and darkest darks. Everything else would be a mid-tone value between the dark and light extremes.
Watercolors
Transparent watercolors require the artist to avoid painting anything that will be white. I stained the top half and bottom quarter of the paper with a pale, muted blue, eliminating all white immediately except for the area I had identified as the brightest—the snowy band encompassing the ground, chair arms, and railing about three-quarters of the way down.
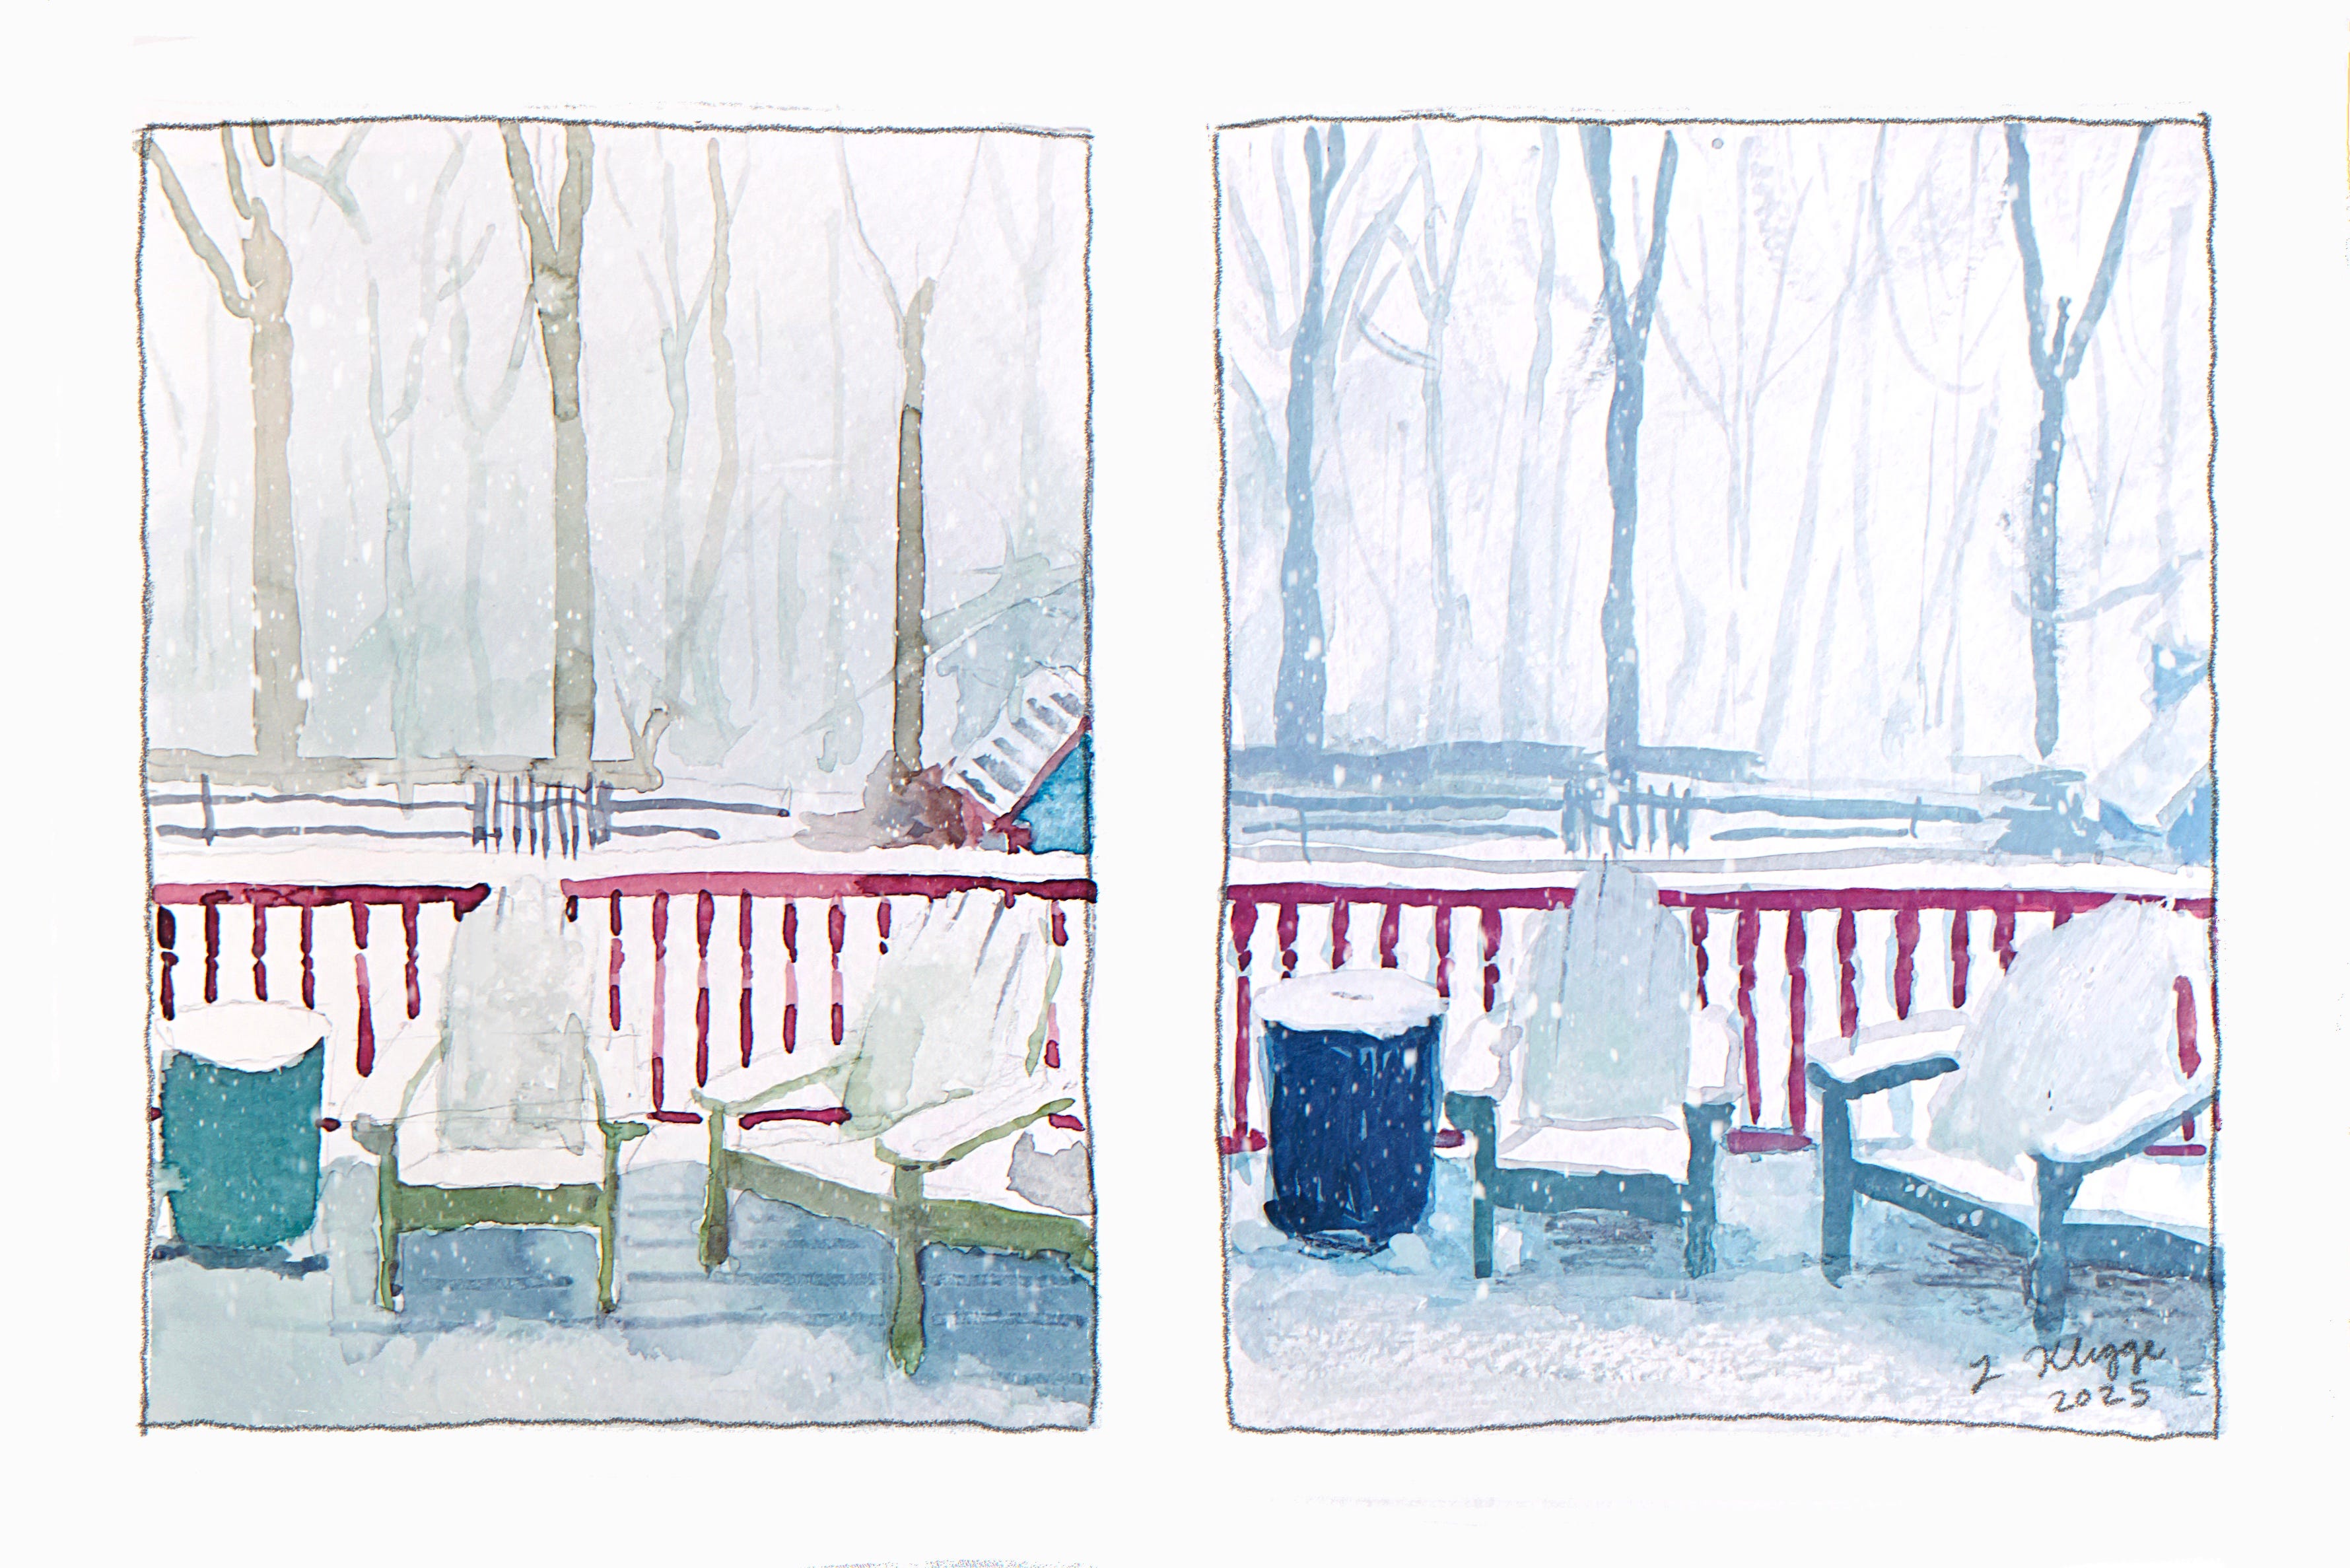
The darkest darks are the side of the pail, the railing, and the spindles, so I marked those, too. Now I just had to fill in the mid-tone values everywhere else.
I painted on wet paper to get soft, blurry edges, but on dry paper to get crisp edges. I tried scratching through wet paint to create lines using the handle of the brush. I diluted my color mixtures with water to create a sense of depth and falling snow in the background.
Gouache
I freely mixed watercolors with gouache in my second demo. The main difference is that gouache allows me to paint opaquely; making light marks over dark ones is possible. So for example I painted the dark, horizontal rail, then used pale gray-green to paint the chair back over that rail.
Just for fun I tried a different blue than the first time (blue-green watercolors, Prussian blue gouache).
I have plenty of gouache articles you can read if you are a paying subscriber or have a comp subscription.
12:30–Coffee break
We got ourselves some tasty coffee, tea, and snacks from down the road at Life’s Patina Cafe, and brought these back to the studio! Conversation was lively and congenial. Then we got back to work.
Speaking of which, after this break the article continues for my students and paid subscribers:
What it was like for the students to practice with watercolors and gouache indoors
Moving outdoors into the cold to sketch
Dealing with added challenges of weather, temperature, changing light, mud, and uneven ground!
1:00—Practice painting indoors
I reminded everyone again to make little sketches of what tonal values and shapes they wanted to have in their painting, and then I set everyone free to practice with watercolors and/or gouache indoors. Some tried adding alcohol to their water—an anti-freezing agent—just to see what it does.
Some students found that alcohol causes the watercolor paint to stick to the paper immediately. There’s no “float” time—no time to move the paint around. Watercolor amended with alcohol behaves, in fact, a lot like an alcohol marker.
Keep reading with a 7-day free trial
Subscribe to Artist's Cheat Sheet to keep reading this post and get 7 days of free access to the full post archives.