


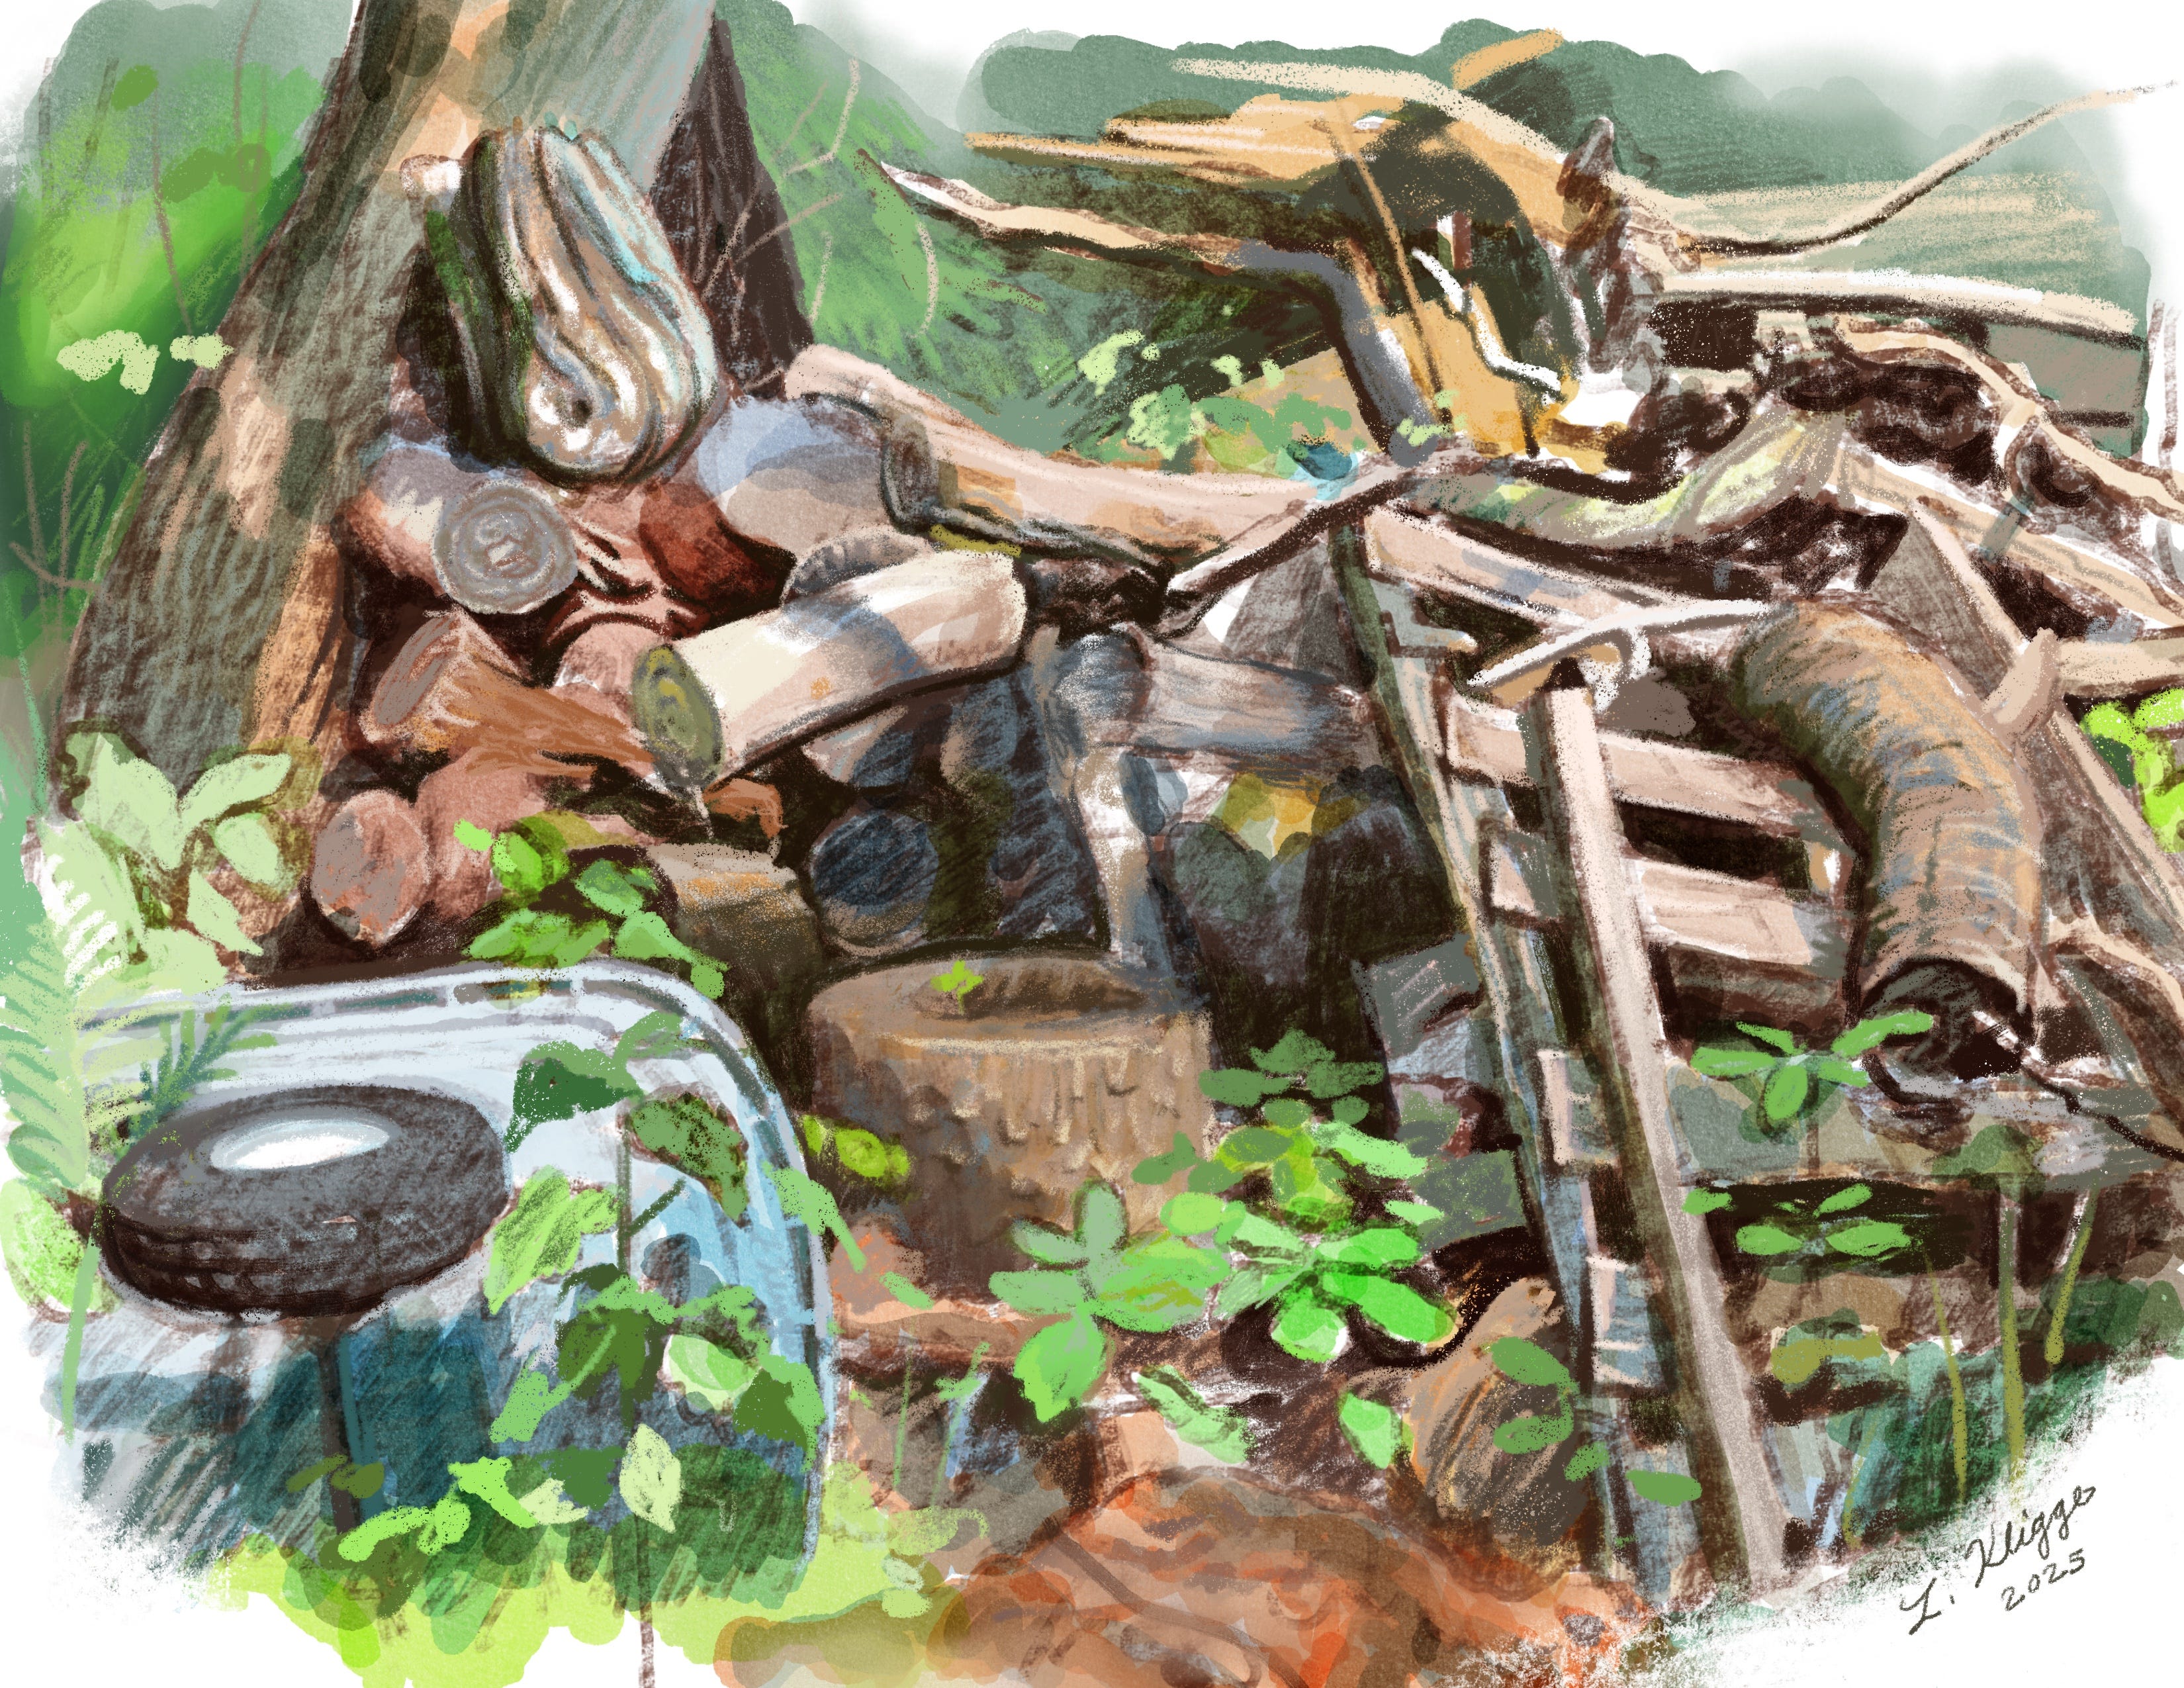
Sketching the View From the Woodshed
How to make sense of a complex scene

Greetings! These are class notes from my workshop Outdoor Mixed Media Sketching at Historic Yellow Springs in southeast Pennsylvania.
The article has a lengthy free preview, and an expanded section for paid subscribers of my Substack showing the step-by-step process of sketching the woodshed scene above. Subscribe to see it now.
James Gurney’s approach
How can you even begin to wrap your mind around a complex outdoor scene, and turn it into a sketch on paper?
In the video below,
talks about seeing and establishing big shapes of light and dark values first; details come later. Think about “the shapes of the tones,” he says.On his palette he freely mixes watercolors and gouache, keeping in mind which will impart transparent or opaque marks.
While James often uses a very limited palette of just two or three colors, this time he includes an all-purpose sap green for foliage; a deeper, duller yellow (ochre) and a bright lemon yellow; likewise, a warmer and cooler red; and lastly, umber, ultramarine, and white.
Next he wets a large area of paper and uses the widest flat brush he has to begin establishing tone and color with light washes, paying attention to the shapes which were established in the drawing stage.
With the paper still somewhat wet, he indicates the broken texture of the tree edges with splayed bristles, and he puts in darker accents as well.
After an hour, the painting has large, generalized patches of color, but no details yet. At this point he switches to a pointed round brush.
James’s painting friend Winsor Kinkade speaks of feeling “lost” in the painting process. This is one of the great challenges of painting in the wide-open outdoors. Unlike a photographic reference, your subject has no established edges or framing; the lighting and focus is dynamic and always changing.
James realizes that his composition is off after he has already begun painting the details of parked vehicles. He ends up painting over them to increase the height of the trees in the distance.
Toward the end, when most of the paint is dry, James goes in with pale, nearly dry color to create delicate, leafy textures. Surprisingly few details are needed to give the painting a feeling of completion.
It begins to rain, and so the painting friends finish up details back in the studio, using photo reference. Notice that James’s wife Jeanette switches to pencil for detail work.
Recommended reading:
Color and Light by James Gurney
The Artist’s Guide to Sketching by James Gurney and Thomas Kinkade
Join my next workshop
Join me for my next outdoor sketch session at Daniel Boone Homestead and get $5 off as a paid subscriber to my Substack. A new paid subscriber benefit will be mentioned below. See all my workshop links here.
Nathan Fowkes’ approach
Concept artist and teacher Nathan Fowkes encourages students to “look for the simple statement.” That’s another way of saying what James said about seeing and establishing large shapes with dark and light tones. Filter out details and leave in “the big picture.” Select details can be added back later. Capturing the simple statement speedily and early is important when the sunlight and shadow shapes are changing.
Nathan also talks about “value grouping.” James’s term is “shape-welding.” In essence this means that you will merge adjacent shapes of similar values. The borders of these merged shapes may or may not coincide with the borders of objects in the scene; most likely they will not. The shadow of an apple may conjoin with the shape of a dark wine bottle, for example, producing an abstract dark shape.
These aggregate shapes are the ones we see first in the “simple statement,” and they influence our emotional response to the picture.
Recommended reading:
How to Paint Landscapes Quickly and Beautifully in Watercolor and Gouache by Nathan Fowkes
Molly Bang’s approach
Molly Bang is not primarily known for her outdoor sketches. She is an illustrator and the author of an excellent book on composition and the emotional impact that shape, value, line, and color will have on your artwork.
I highly recommend her book for a better understanding of the “big picture” kind of thinking that’s been mentioned throughout this article. You’ll find a video review (by Marshall Vandruff) of the book on my Artists’ Resource List, found in the homepage navigation bar.
Recommended reading:
Picture This: How Pictures Work by Molly Bang
A new paid subscriber benefit
If you are enjoying these class notes, hopefully you’ll consider becoming a supporter for the current price of just $6 per month or $60 per year. Get 20% off when you and a friend join with a group subscription.
A new benefit to paid subscribers (coming soon) will be Office Hours, where we will meet, chat, and create together online. Paid subscribers will be invited via email. And now, back to the show!
How I sketched View From the Woodshed
Finally, here is the illustrated, step-by-step process for my sketch View From the Woodshed:
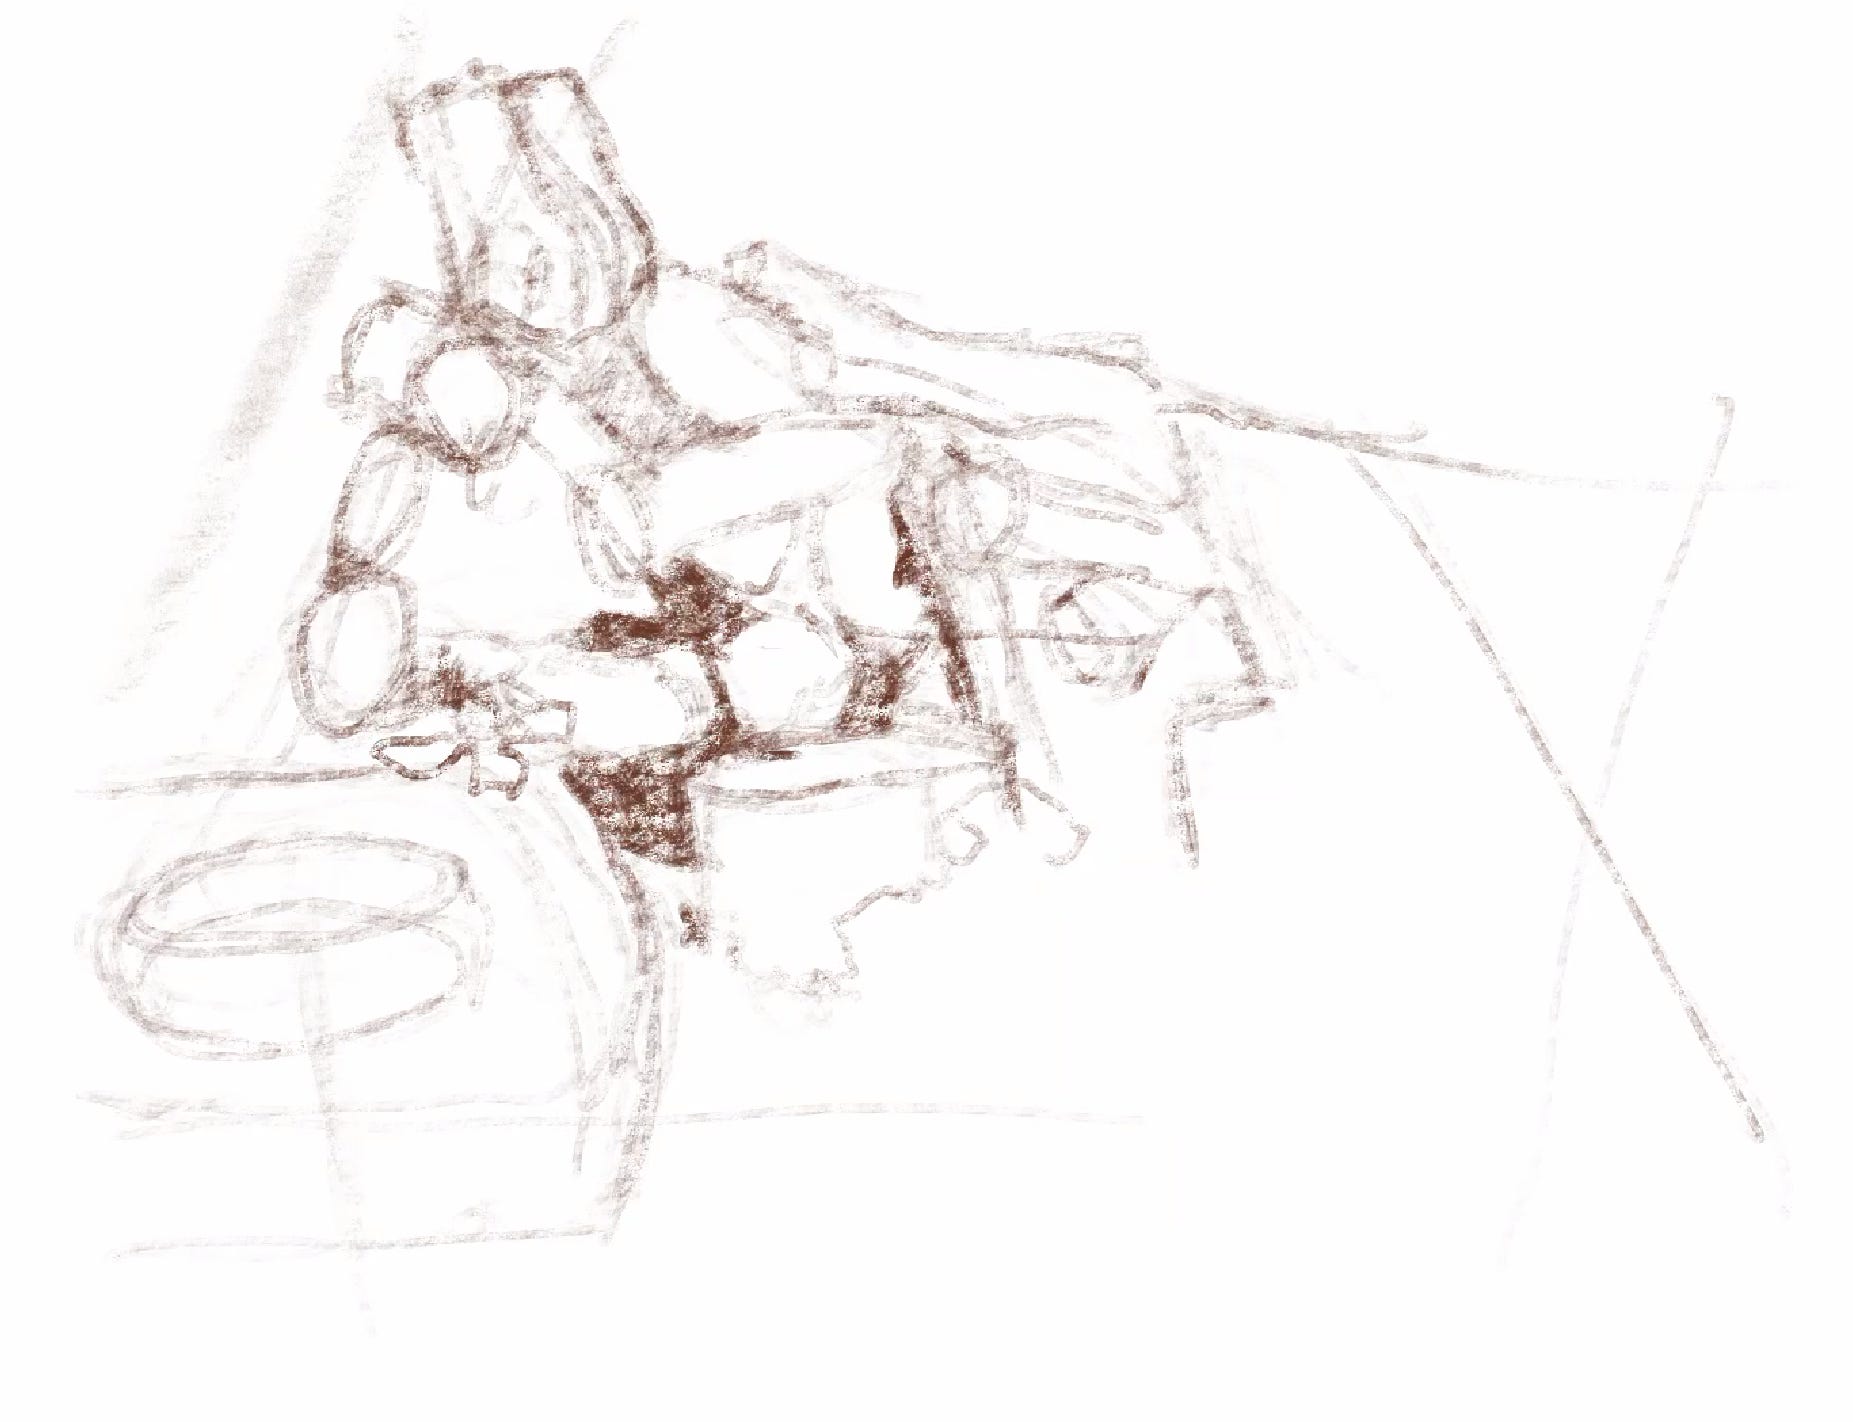
In the beginning I make loose, exploratory marks and trying to get oriented within the scene. After establishing an outer “envelope” to contain other shapes, I check each measurement multiple ways (vertical and horizontal alignments, size comparisons) to achieve greater accuracy. I start scribbling in some dark landmarks to help me find my way:
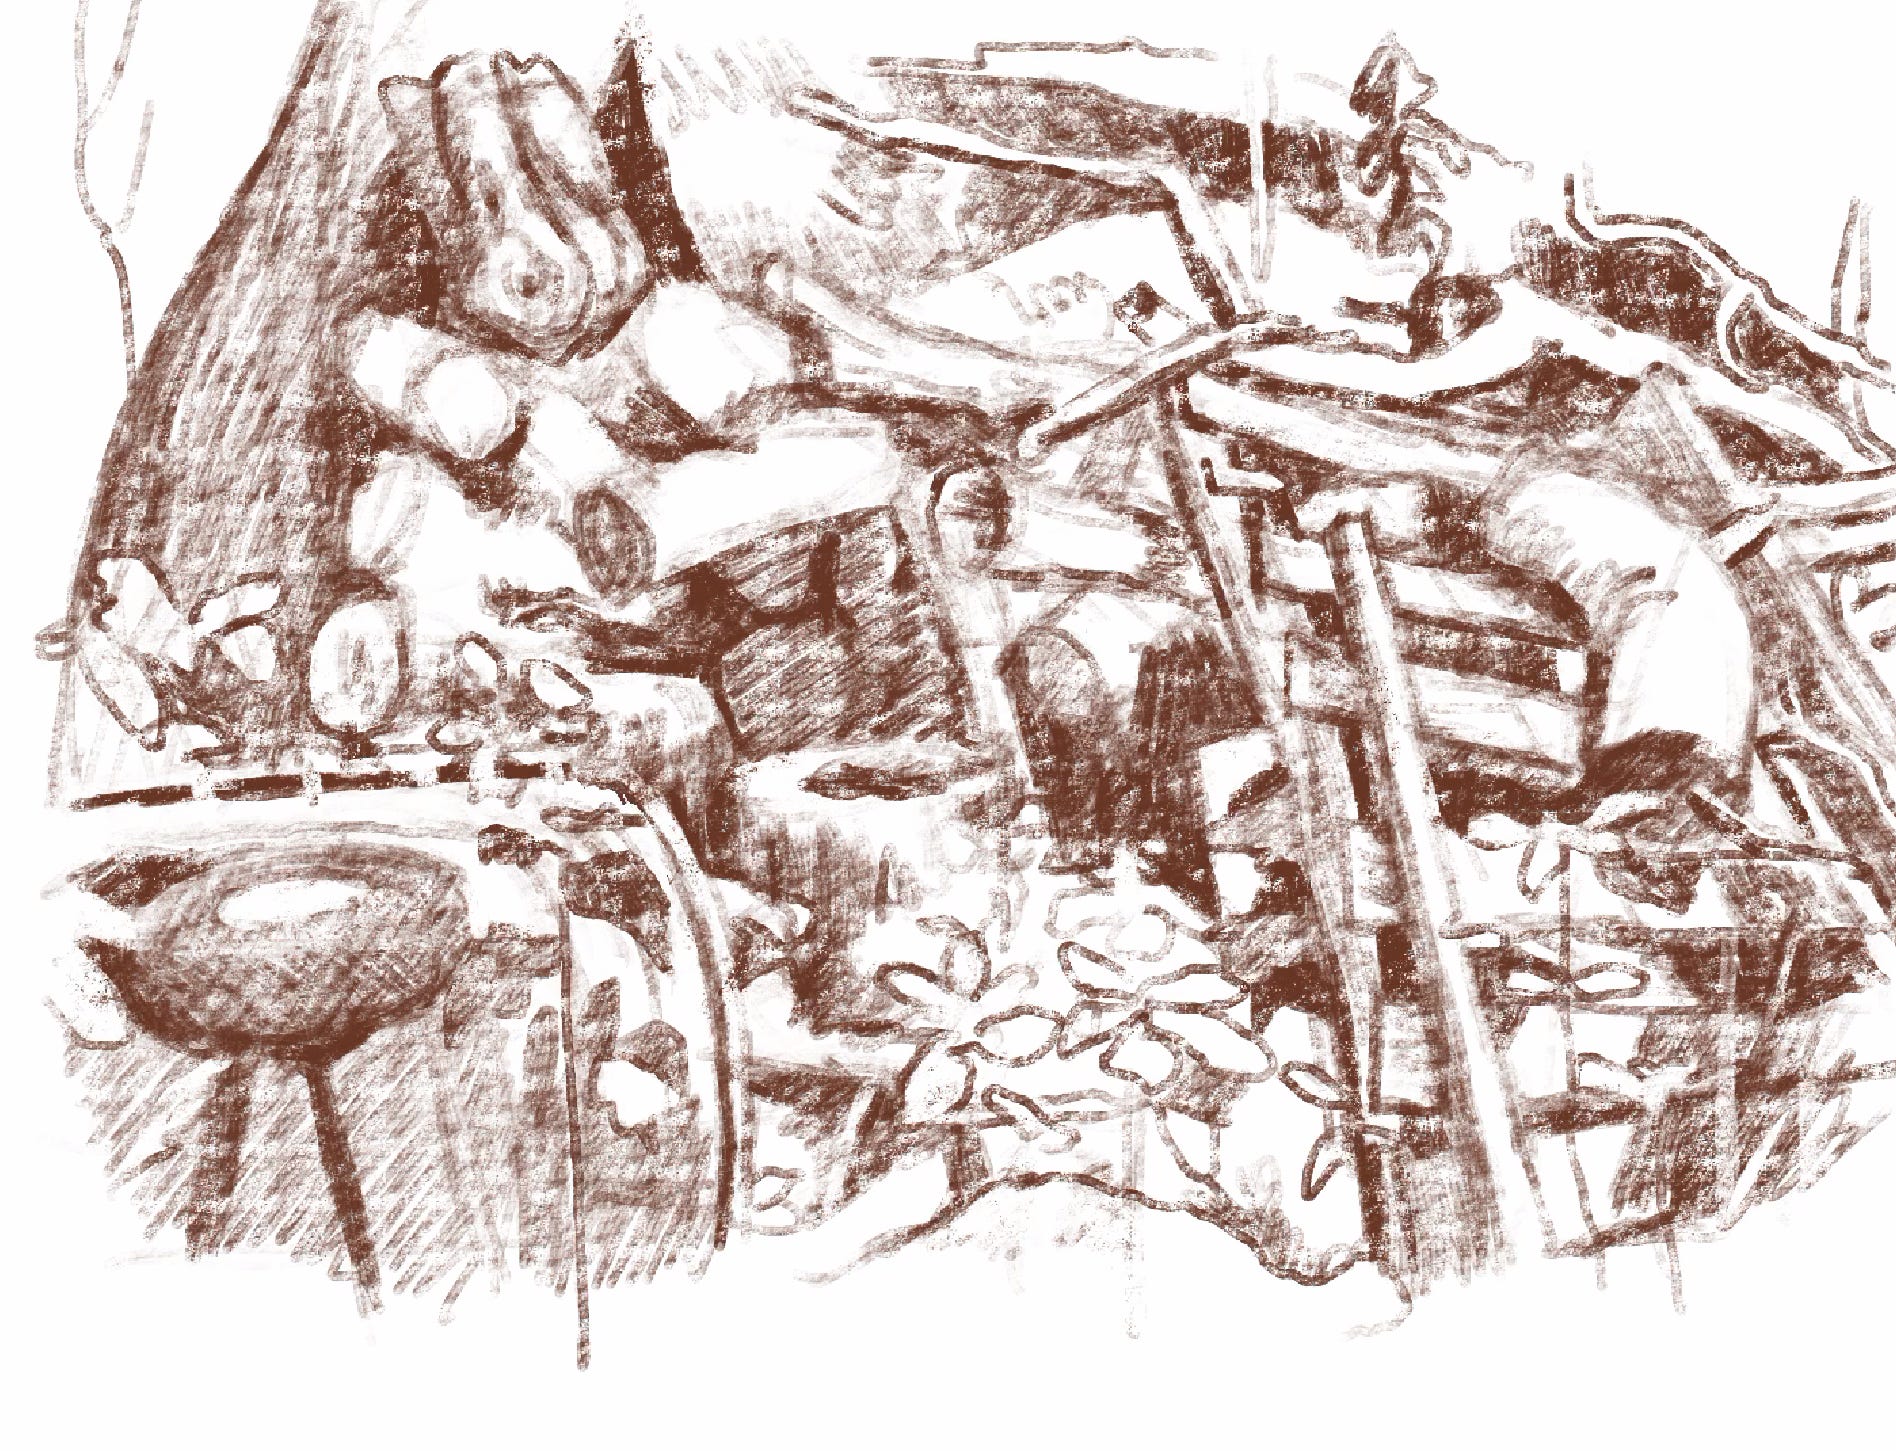
Building on what I already know, I continue adding shapes into the composition: this includes defining the shapes of objects, but also shadow shapes and the shapes of light areas.
I am selective about what I emphasize from the real-life scene. Think of this process as telling a story—giving more attention to the interesting stuff while subduing other areas. Just as every good story needs slow passages in-between the action, a picture needs areas of rest and activity. This composition is challenging, because there is a lot of activity in the scene:
Keep reading with a 7-day free trial
Subscribe to Artist's Cheat Sheet to keep reading this post and get 7 days of free access to the full post archives.